

C O N S T U C T I O N P R O C E S S

Quick Links
|
Much like the design process, the construction process can seem foreign to homeowners, but it too has a predictable sequence and rhythm. |

S T A G E # 1
Pre-Construction Planning
Each builder structures this phase in their own unique way, but in general, the first item of business in PreConstruction Planning is signing a construction contract which articulates construction costs, builder fee, and project timing [or also called the “move in date”].
At this time, the homeowner also provides a down payment, typically 10% of the project cost.
After all contractual and bookkeeping items are addressed, the process moves on to these next two steps.
At this time, the homeowner also provides a down payment, typically 10% of the project cost.
After all contractual and bookkeeping items are addressed, the process moves on to these next two steps.
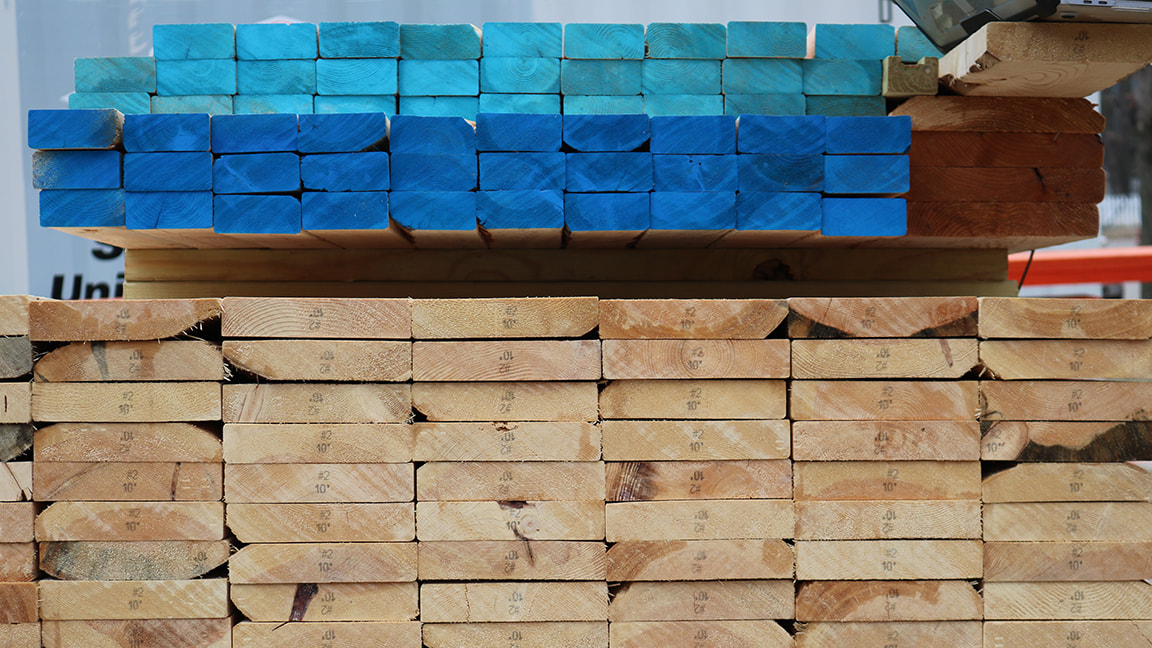
STOCKPILE One of the primary roles of a builder is to source and order building materials. Framing lumber is one of the earliest, largest and costliest of most any project.
Securing a Building Permit
The first step is to secure a building permit from the local municipality governing your property address. Only the builder or the homeowner may submit for permit, with the builder most often fulfilling this role. During the permitting process, the project is reviewed twice, first by the Zoning Department and then by the Plan Review Department.
Reviewing the site plan and exterior elevations, the Zoning Department looks at larger site and building considerations, like the proper amount of glass, determining the location of property lines, establishing applicable setbacks, and confirming the building is within the maximum allowable height and sq. ft. limits.
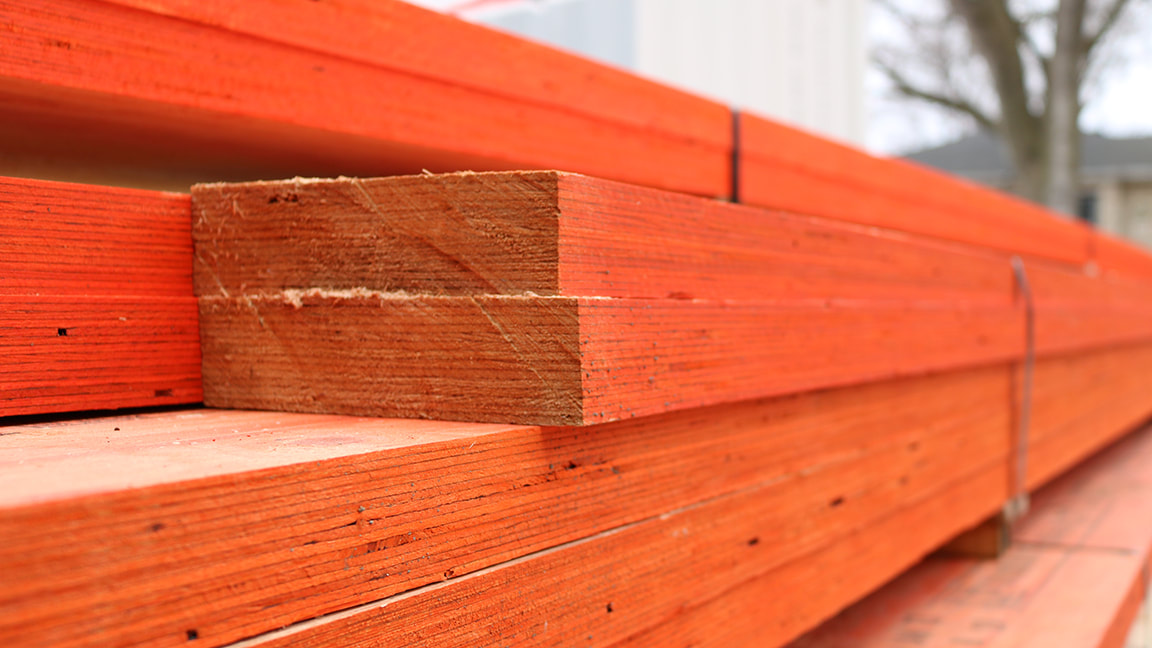
STOCKPILE TWO Some times the material markings and colorings are stunningly beautiful and make for unplanned art installations. We may be a bit hyperbolic, but these stacks of "sticks" can certainly grab your attention.
Following the Zoning review, the project heads to Plan Review, where plan reviewers check for dozens of construction specific issues [e.g. construction assemblies, insulation levels, proper sizing of structural elements, and compliance with minimum plumbing fixture clearances]. If the project meets all Zoning and Plan Review requirements, they city may issue a building permit and the project is immediately cleared to proceed.
Typically municipalities have up to a maximum of three weeks to review a project and issue a permit. The full three weeks are often needed (if not more); however, when planning a project schedule, it is wise to assume a minimum of full three to six weeks will be needed.
Typically municipalities have up to a maximum of three weeks to review a project and issue a permit. The full three weeks are often needed (if not more); however, when planning a project schedule, it is wise to assume a minimum of full three to six weeks will be needed.
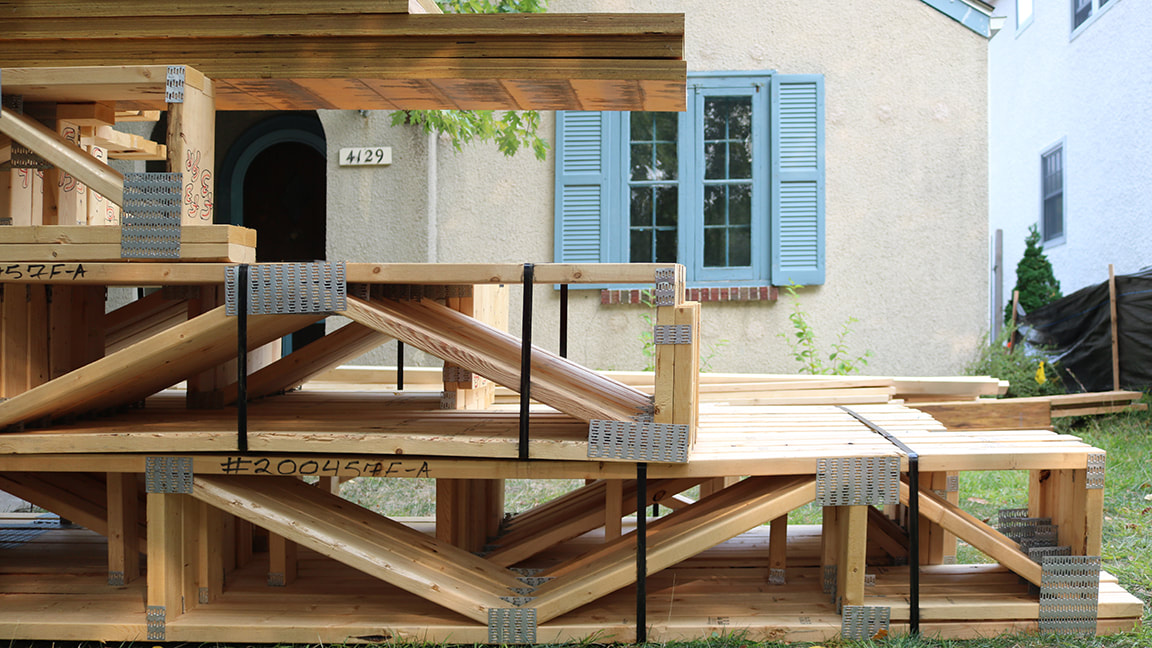
TRUSSES One of the first stock piles of building materials to arrive on site are floor trusses. The more of your house arrives prefabricated offsite, the faster and cheaper your project becomes.
Material Ordering/Sequencing
Understandably, builders do not want to commit large amounts of time or funds to a project in advance of securing a building permit. If there are any permitting issues which might delay or sidetrack the project, builders don’t want to have too many resources invested.
> When to Select a Builder
Once a permit is secured, however, builders switch their focus to ordering long lead time items, such as doors, windows, roof and floor trusses.

S T A G E # 2
The Construction Sequence
Once the permit is secured and materials are ordered, work can begin on the project. The construction sequence outlined below is typical, although not all steps may be required for your project.
The required inspections are listed, as well.
Project Open House [only for new construction]
An information only open house arranged and hosted by the builder that allows neighbors and interested parties to review the project and ask questions prior to demo.
Demolition
Areas impacted by project are removed or altered
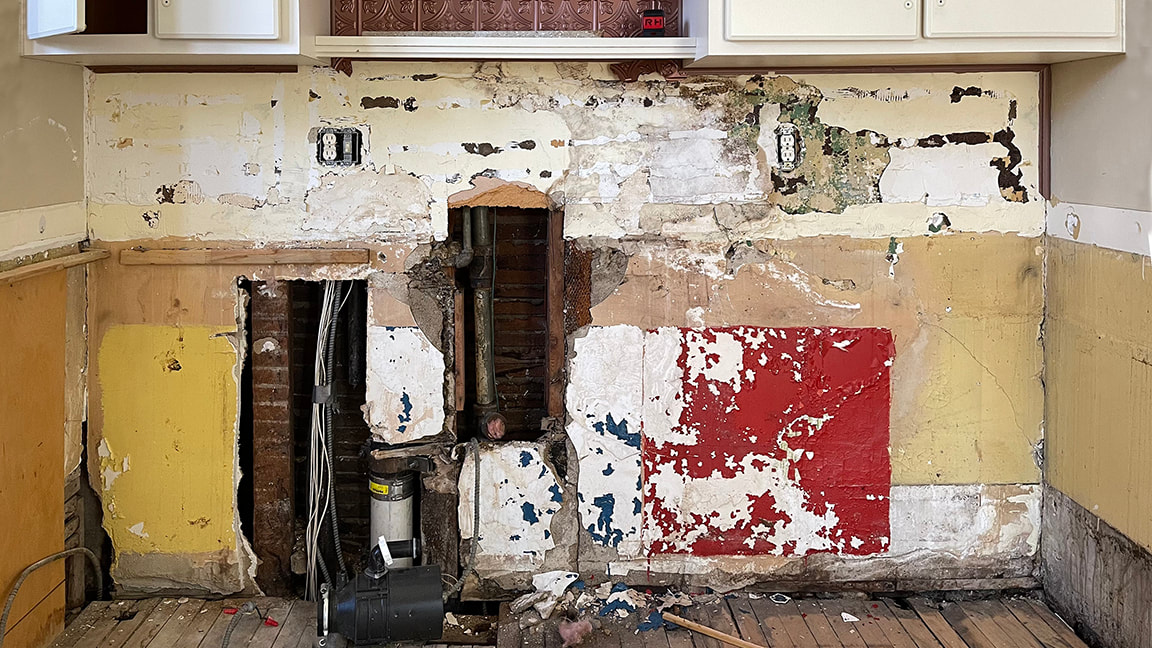
DESTRUCTION BEFORE CONSTRUCTION Before any new work can begin, demolition must occur. Depending on the scope of the project, this may be weeks worth of messy and loud "progress". This wall reveals nearly 150 years of history - a beautiful and fascinating look back at the dynamic life of the house.
Site Preparation
Staging areas established, fences removed, site access secured, and landscaping protected
Excavation/Foundation
If additional square feet are being added, excavation, footings and foundations completed
> Inspections: Footings & Under-Slab Plumbing
Staging areas established, fences removed, site access secured, and landscaping protected
Excavation/Foundation
If additional square feet are being added, excavation, footings and foundations completed
> Inspections: Footings & Under-Slab Plumbing

CAN YOU FIND THE CHEEESE? Sometimes the amount of excavation and form work required to pour concrete footings can be a complex, maze-like construction. Here, 2'x2' concrete grade beams are being formed to support a two-story rear addition on poor soils.
Rough Framing
New walls and floors are framed; window/door rough openings are established
Roof Installation
Roof trusses are sheathed and shingled to keep home secure from elements
Window/Door Installation
New door and window units installed
New walls and floors are framed; window/door rough openings are established
Roof Installation
Roof trusses are sheathed and shingled to keep home secure from elements
Window/Door Installation
New door and window units installed
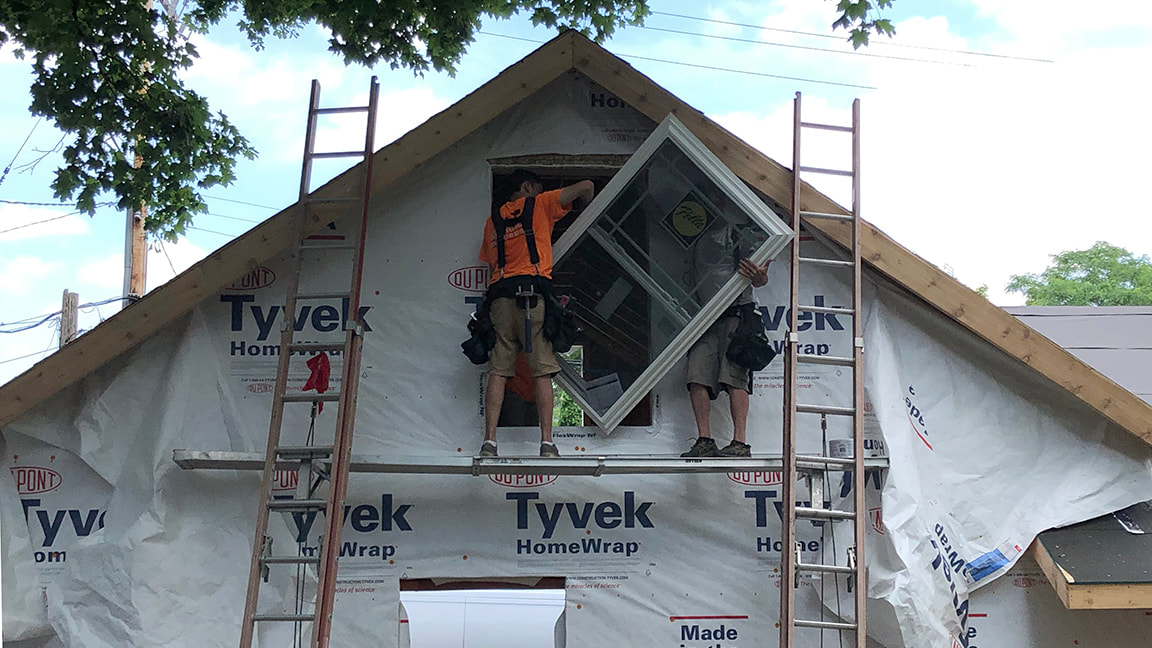
EASY DOES IT One of the final efforts to enclose a house is the installation of the windows, but it is not a simple task. Often high off the ground, a window unit may be 40+ pounds requiring one person, if not more, to be stationed on the outside of the house.
Mechanical/Electrical/Plumbing Rough-ins
Mechanical, electrical, and plumbing systems roughed in
> Inspection: M/E/P
> Inspection: Framing
Insulation
Walls, floors, rims, and attic insulated
> Inspection: Insulation
Drywall
Drywall hung, taped, mudded, sanded, and primed
Mechanical, electrical, and plumbing systems roughed in
> Inspection: M/E/P
> Inspection: Framing
Insulation
Walls, floors, rims, and attic insulated
> Inspection: Insulation
Drywall
Drywall hung, taped, mudded, sanded, and primed
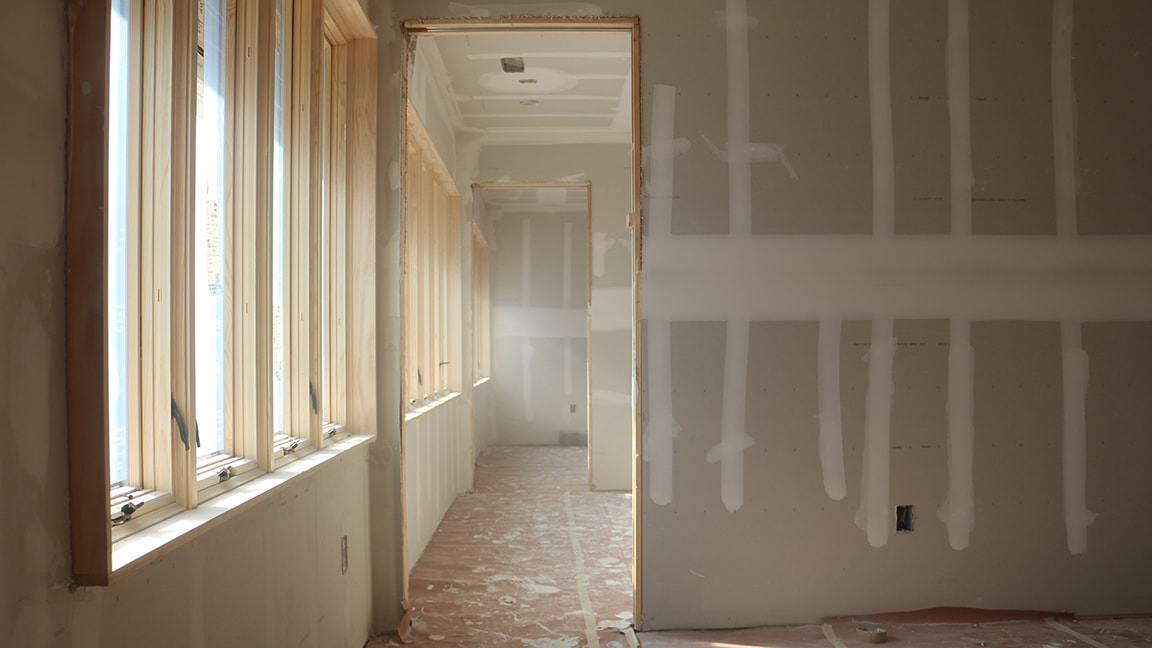
THANKS, BUT NO THANKS In our estimation the hanging, taping, and mudding of drywall is the most demanding and difficult interior work performed. It is also the point during the construction phase when most homeowners "hit the wall" and find themselves overwhelmed and exhausted by the length and mess of their project. But what comes next, however, the installation of all of the fixtures and finishes is the most exciting period in a project and when the light at the end of the tunnel can be seen.
Siding
Exterior siding materials installed
> Inspection: Waterproofing
Finished Carpentry
Interior doors hung, doors/windows cased, custom casework and cabinets installed
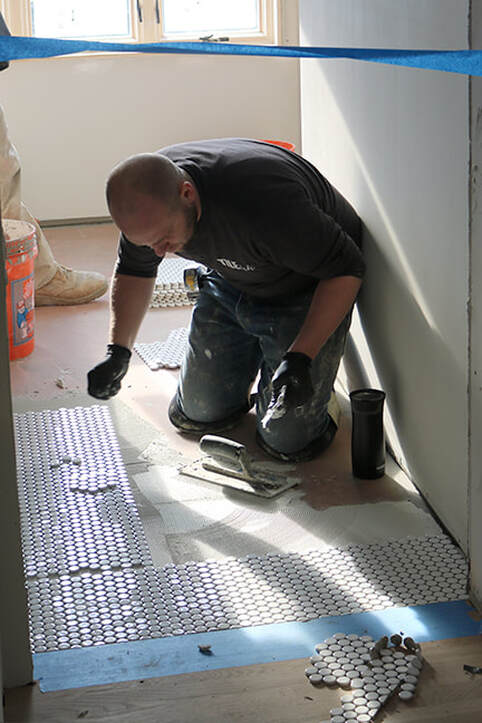
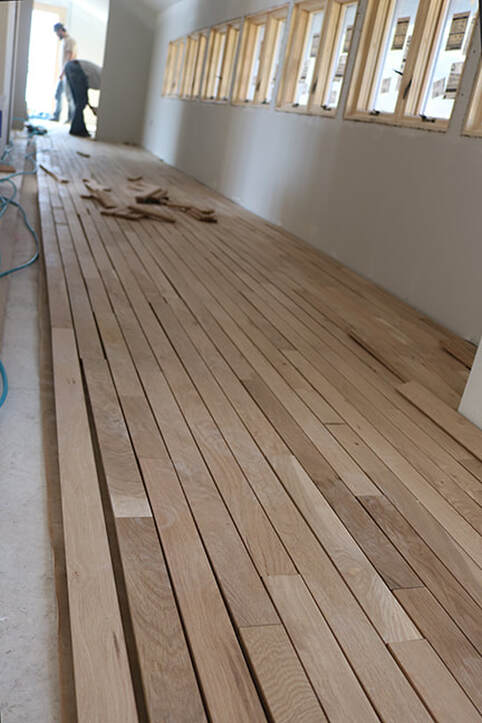
Surfaces & Finishes
Hardwood floors and tile laid, countertops measured and installed, wall finishes hung
Exterior siding materials installed
> Inspection: Waterproofing
Finished Carpentry
Interior doors hung, doors/windows cased, custom casework and cabinets installed
Surfaces & Finishes
Hardwood floors and tile laid, countertops measured and installed, wall finishes hung
|
|
HIGH VISUAL YIELD This is when the project gets really exciting and starts to take on its aesthetic flair. When rough and marred surfaces begin to give way to glossy and sanded finishes our heart starts to race! This is when all of the hard work and attention to detail pays off.
Interior
Ceilings and walls painted, wallpaper hung, accessories and hardware mounted
Mechanical/Electrical/Plumbing Final Connections
Vent hoods and bath fans connected, plumbing fixtures installed, and light fixtures hung
Exterior
Decks, fences and steps built
Exterior Painting
> Inspection: Final
Hardscape Installation
Patios, sidewalks, driveways and retaining walls installed
Landscape Installation
Landscape items installed. Typically, this work is beyond builder scope and is instead handled by a landscape company

S T A G E # 3
Punch List
Once construction is substantially complete [around 95%] the designer, in conjunction with the homeowner[s] and builder, assemble a Punch List. It's a collection of outstanding work items and issues that need to be addressed and completed by the builder prior to the final progress payment being made.
Unless there is a large item needing attention, it's standard to allow approximately one week for an item on the list to be addressed. Following the final walk through and the approval of all outstanding work items, the final payment [approximately 10% of the construction budget] is released to the builder.
Unless there is a large item needing attention, it's standard to allow approximately one week for an item on the list to be addressed. Following the final walk through and the approval of all outstanding work items, the final payment [approximately 10% of the construction budget] is released to the builder.