

T I M E T O D I G I N

Quick Links
|
The Design Development phase is arguably the most demanding and potentially overwhelming phase of the design process. |
T H E B I G P U S H
Exploring & Verifying
During the Design Development phase there is a lot of design and development happening. We often call the Design Development phase the "big push" as a lot of design development decisions are moved forward.
The design direction established earlier in Schematic Design, for example, is further explored and verified. Bathroom layouts are adjusted to accommodate plumbing fixture clearances, floor plans are scrubbed to verify they accommodate furniture groupings, appliances, cabinets, and any existing site or building constraints.
Hand sketches, 3D modeling information, and preliminary computer studies are reviewed and preferred options are transitioned to AutoCad or Revit.
> ARTICLE: Interior Design Process
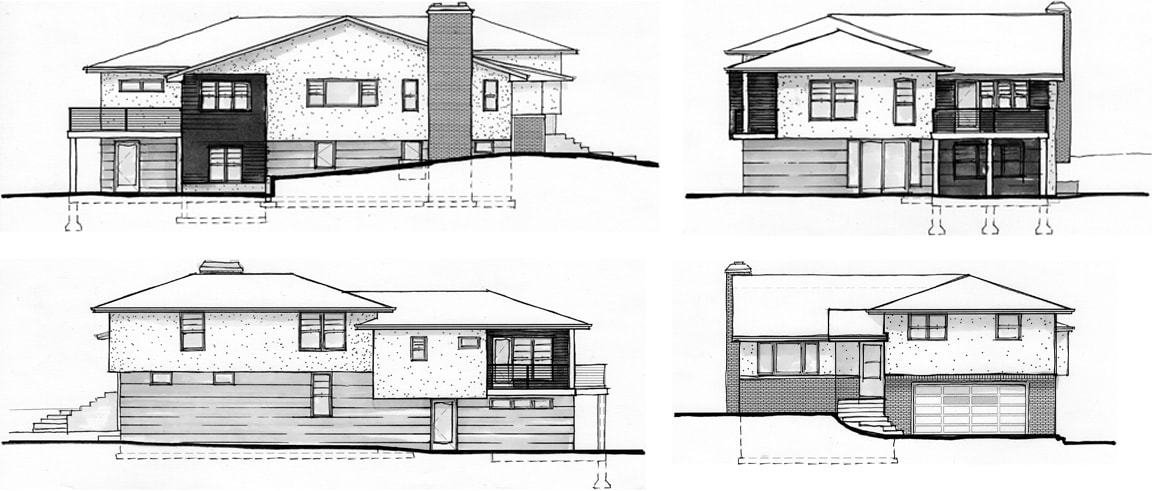
Exact sizes and relationships of rooms are established and the overall volume of the building or addition is settled. The initial set of exterior elevations are drawn and building square footages are calculated and preliminary electrical layouts are begun.
Deliverables
> Enlarged Floor Plan[s] – areas of particular complexity or importance are enlarged
> Building Section[s] – verify building and floor heights and structural attachments
> Reflected Ceiling Plan[s] – electrical fixture and switching layouts are developed
The design direction established earlier in Schematic Design, for example, is further explored and verified. Bathroom layouts are adjusted to accommodate plumbing fixture clearances, floor plans are scrubbed to verify they accommodate furniture groupings, appliances, cabinets, and any existing site or building constraints.
Hand sketches, 3D modeling information, and preliminary computer studies are reviewed and preferred options are transitioned to AutoCad or Revit.
> ARTICLE: Interior Design Process
Exact sizes and relationships of rooms are established and the overall volume of the building or addition is settled. The initial set of exterior elevations are drawn and building square footages are calculated and preliminary electrical layouts are begun.
Deliverables
> Enlarged Floor Plan[s] – areas of particular complexity or importance are enlarged
> Building Section[s] – verify building and floor heights and structural attachments
> Reflected Ceiling Plan[s] – electrical fixture and switching layouts are developed
S U R F A C E S
Interior Design
Add to all the massive drawing development the material and fixture selection process, which, for many, is an exciting (and sometimes overwhelming aspect) of a renovation project. Dozens, even hundreds of decisions need to be made by the homeowner, catalogued by DLD, and integrated into the drawings.
> Read more about our Interiors services
If you work with DLD on interiors, will we not only schedule and guide the selection process, but we will also produce two key deliverables - interior elevations and the selection schedule.
Interior Elevations
Think of interior elevations as floor plans for the walls, or better yet, wall plans that explore the "vertical" information on select interior walls.
The drawings feature cabinetry layouts, finishes, and details, as well as wall tile layouts, shelf, light fixture, and bathroom accessory mounting heights.
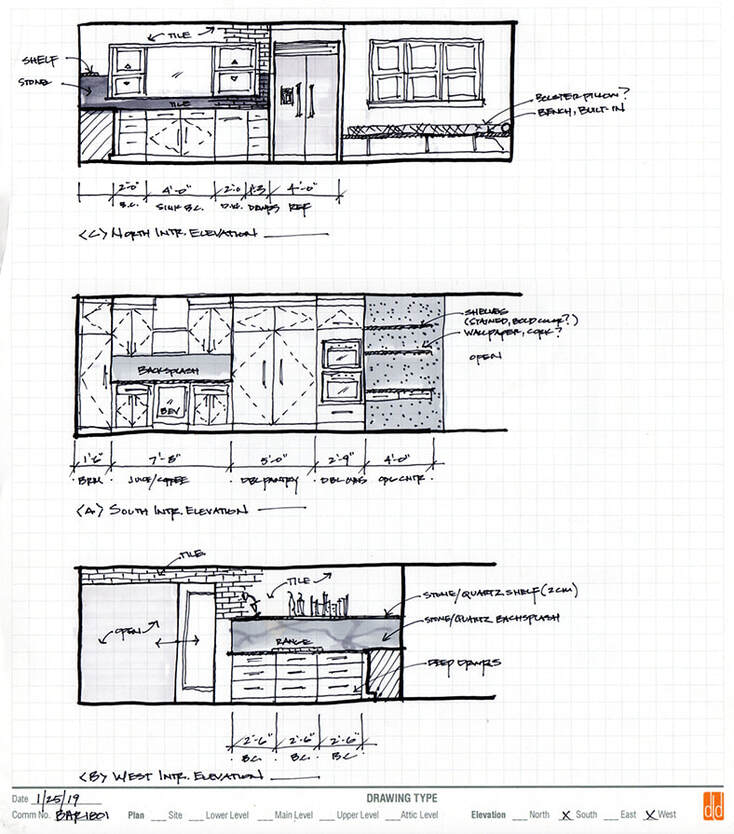
BACK TO THE DRAWING BOARD Just like in Schematic Design, we may return to hand sketching or marker rendering to convey design options. For the first time, in Design Development, we start to consider what goes on the walls.
Selection Schedule
Yes, we are designers, but lucky for you, we are nerds, too.
Over the years, we have developed organizational tools - templates, forms, and spreadsheets – to better track the many decisions common to the material selection process. Our selection schedule is a highly ordered organizational system designed to deliver a successful project free of last minute scrambles and aesthetically harmonious.
The Selection Schedule is a proprietary spreadsheet, where all of the selections are cataloged. It not only tracks your selections, but it also tracks item numbers, sizes, profiles, finishes, quantities, discounts, pricing, sourcing, and product lead times.
Whew!
> ARTICLE: Material & Fixture Selection
We have found [and experienced ourselves!] that the chaos and stress of the selection process is greatly reduced when you can not only see all of your selections in one place but also measure their cost – all in real time.
Who knows, with this level of organization, you may even enjoy the process!
V I S U A L I Z A T I O N
3D Modeling & Rendering
Sometimes the best way to explore and communicate design options is through a 3D model. Most people have a basic understanding of room size, building scale, proportion, and circulation flow simply from looking at a floor plan, but it can be difficult and may only be a partial understanding of the full picture. The ability to visualize fully how a proposed design is going to look and feel is unfamiliar territory for most people.
A 3D model is neither reality nor a substitute for all other drawing and documentation efforts. It can, however, be an effective tool at aiding in the understanding and communication of design decisions. Spatial relationships, light quality, as well as the impact of color and material selections are common conditions that can be made much more evident in the model.
A 3D model is neither reality nor a substitute for all other drawing and documentation efforts. It can, however, be an effective tool at aiding in the understanding and communication of design decisions. Spatial relationships, light quality, as well as the impact of color and material selections are common conditions that can be made much more evident in the model.
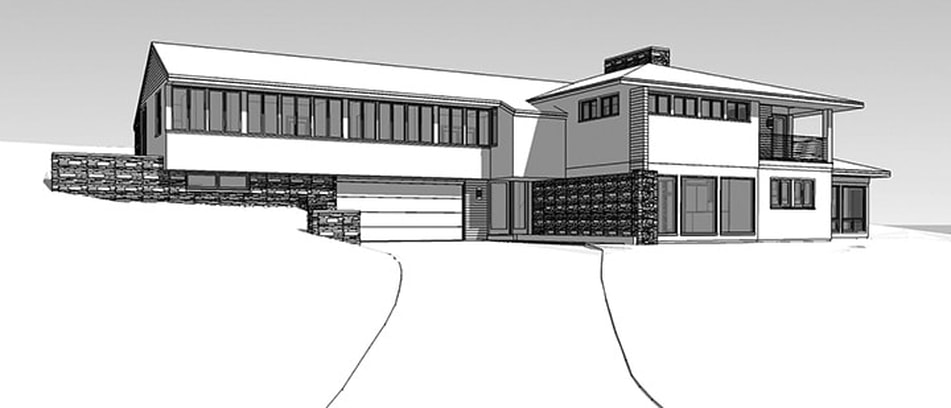
These images are a collection of perspective views or "scenes" based off of a 3D SketchUp. These scenes were selected to best communicate design direction to the homeowner, but any view is possible.

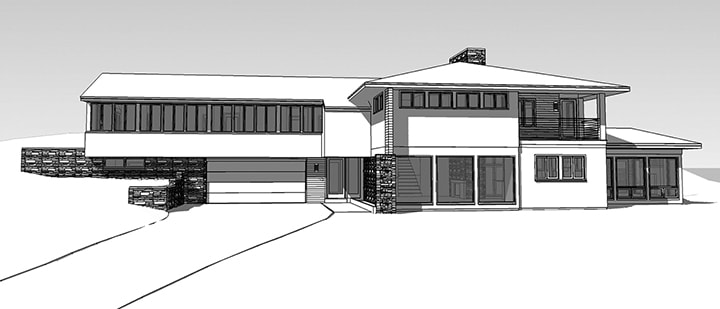
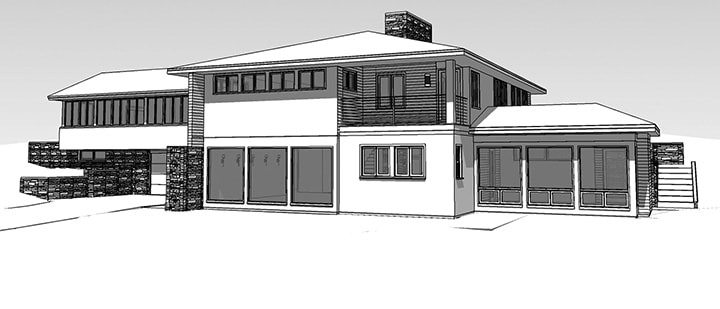
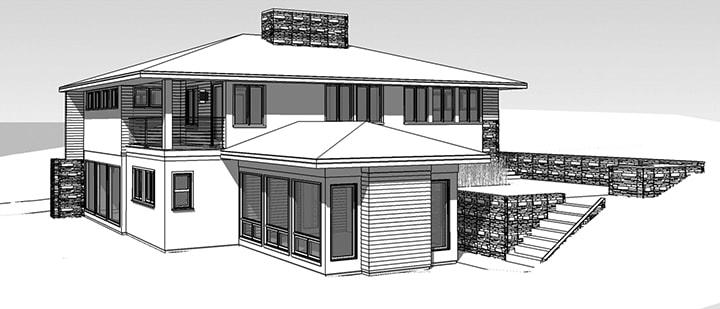
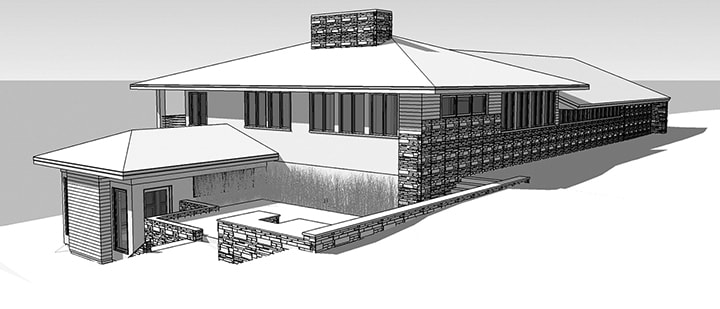
Typically we work in SketchUp. It's a versatile software platform that can quickly establish accurate and informative models that can be of great assistance during the design process. Being able to see and experience your design in 3D will help you better understand how it's going to look and the better you understand the final outcome, the more comfortable you'll be with your decisions.
And that's a good thing.
Rendering
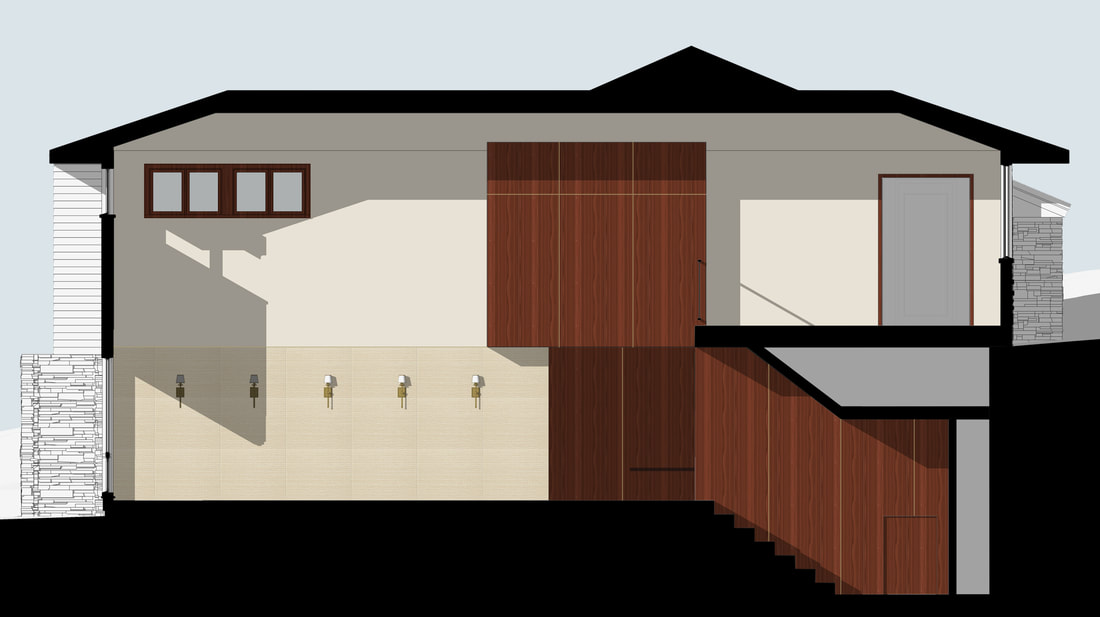
SketchUp is great for overall mass, layout and perspective views, but to bring the model to life, we often take specific elevations and bring them into Photoshop to apply materials, textures, color, and entourage, giving the images more life, depth, and anchoring them to the site. This is commonly referred to as rendering.
The images below are Photoshop renderings of the cardinal exterior elevations and an interior volume of the SketchUp model above.
And that's a good thing.
Rendering
SketchUp is great for overall mass, layout and perspective views, but to bring the model to life, we often take specific elevations and bring them into Photoshop to apply materials, textures, color, and entourage, giving the images more life, depth, and anchoring them to the site. This is commonly referred to as rendering.
The images below are Photoshop renderings of the cardinal exterior elevations and an interior volume of the SketchUp model above.
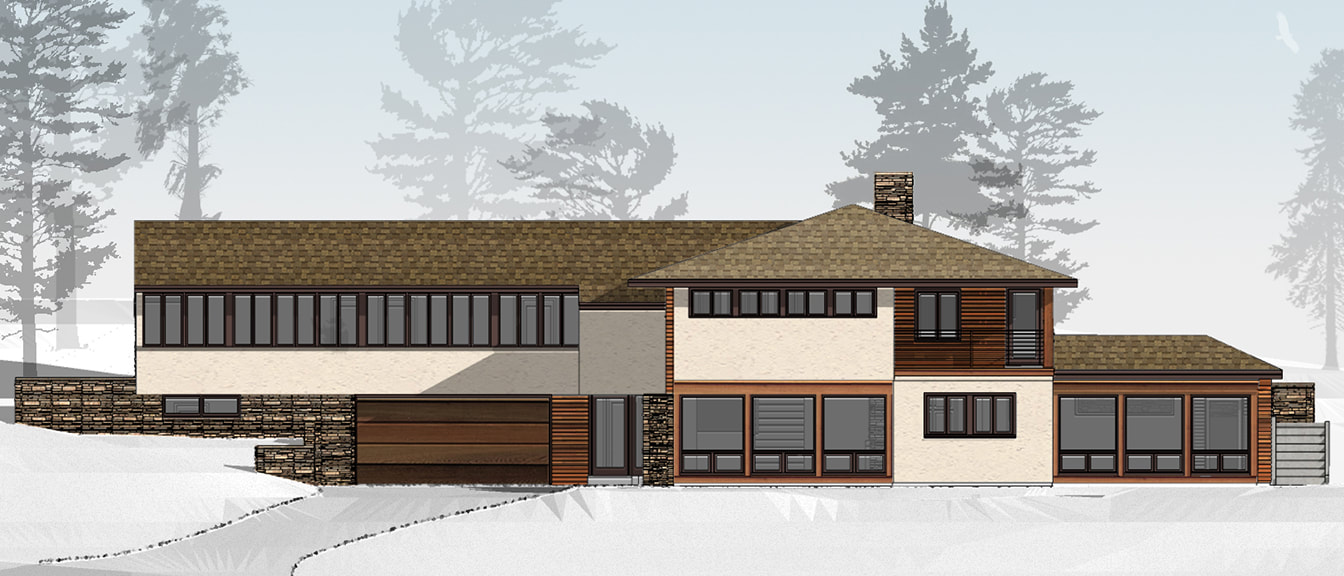
South Elevation
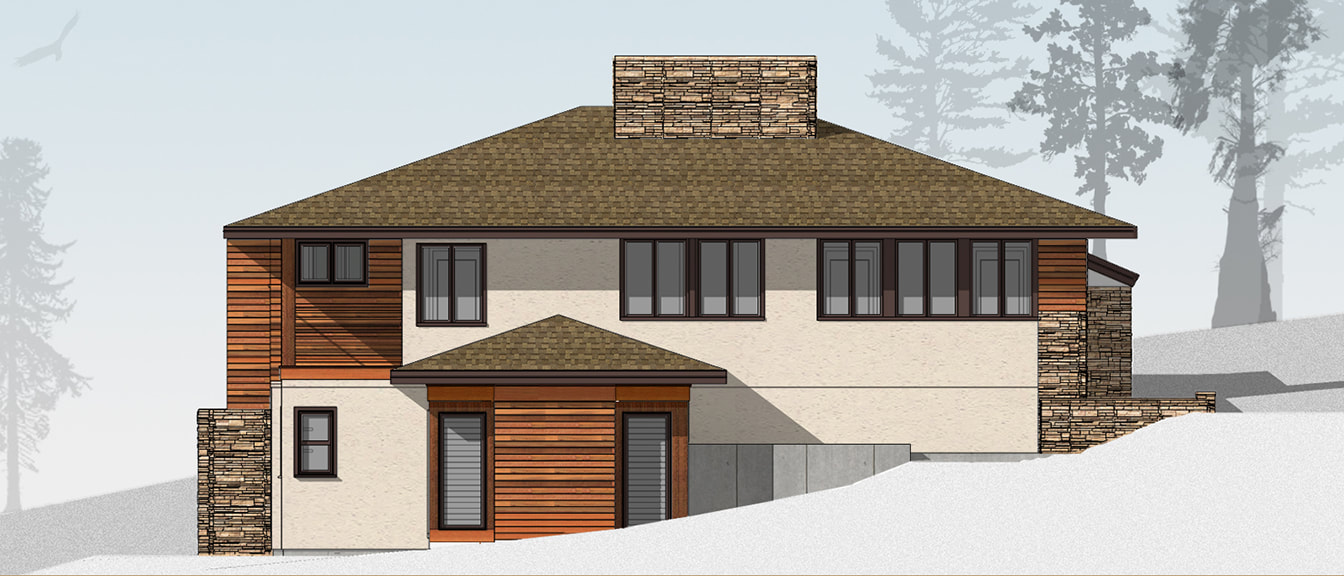
East Elevation
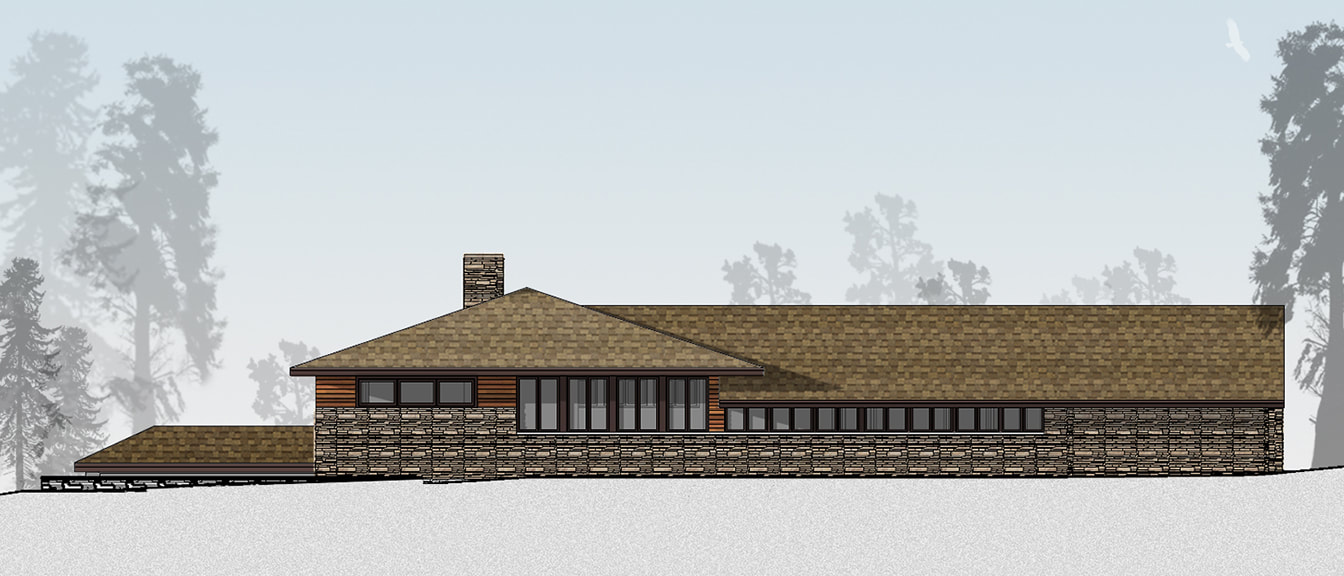
North Elevation
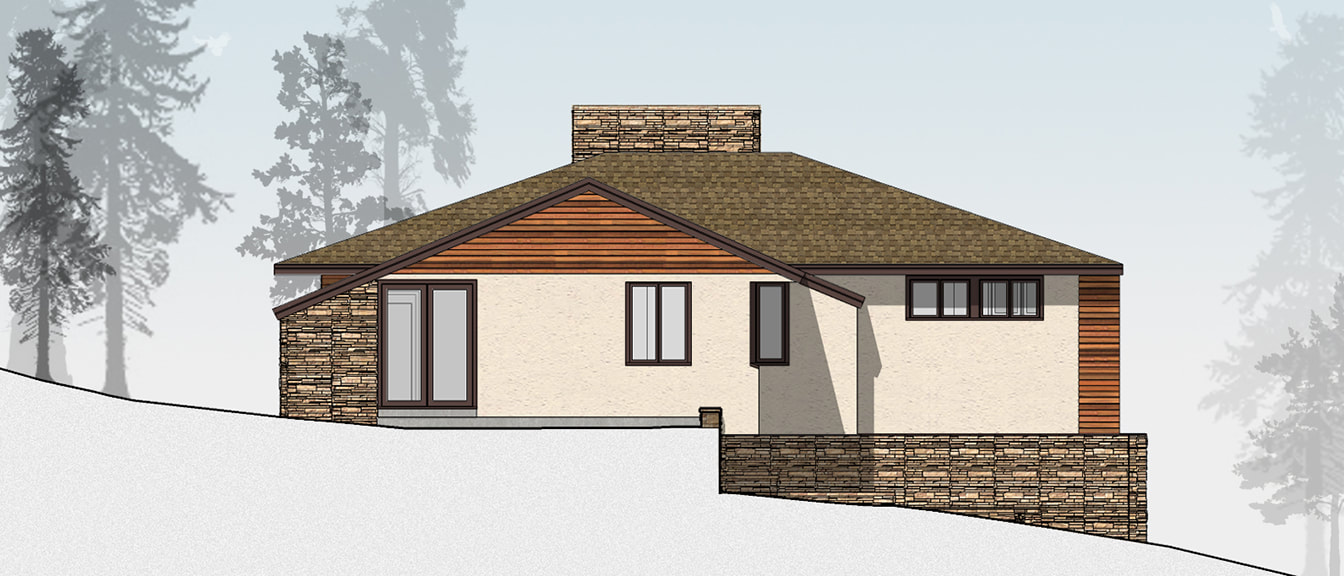
West Elevation
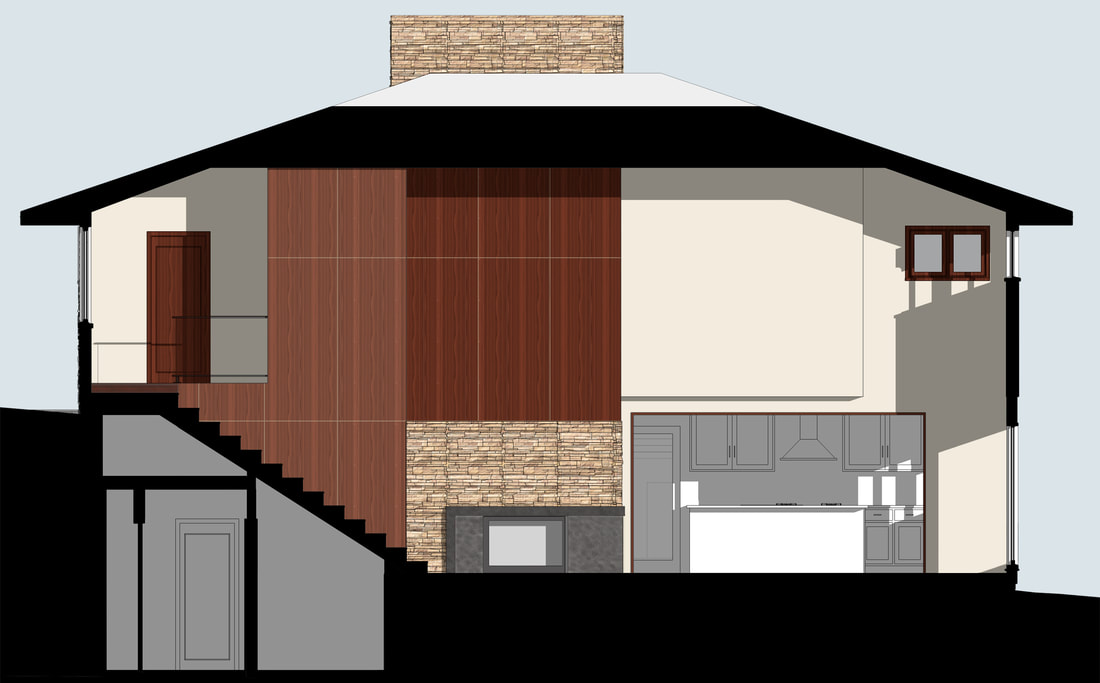
FEATURED FOCUS This project had a dramatic central space with large surfaces. It was rendered so materials and their location could be studied.
Next Phase: Construction Documents