
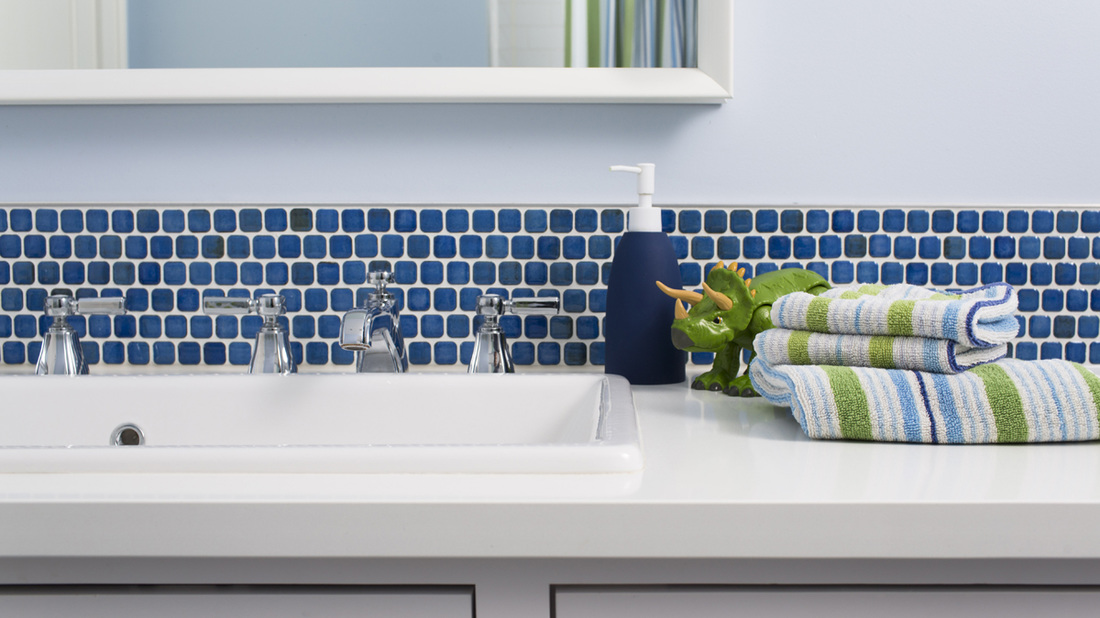
 "High/Low" On most projects we employ a design sensibility we call "high/low". It reflects our belief that not all design selections need be expensive to be beautiful. Instead, pick a few select spots to splurge (this is the "high") to be mixed in with the more budget-friendly choices (this is the "low"). One of the best times to employ this idea is with tile. Tile selections can easily become one of the most expensive materials in a project, and having a "high/low" strategy when making your selections can not only save money but deliver some compelling design solutions, as well. The "High" or Pick a Spot for the Pop When it makes sense, we may spend more on a tile we love. Smaller featured areas, such as a powder room floor or a kitchen backsplash, are perfect places to splurge with a more expensive tile selection. The price difference between a simple tile at $8/SF and a gotta-have-that-tile-or-I'm-gonna-melt tile that is $40/SF might initially seem like a big spread. But do the math. A simple, main level powder room, for example, may only be 7'x3'. That's 21 SF of floor tile. Using the above tile costs, the price range of our two tile options would be $168 to $840, or $672. Yes, the more expensive tile option costs 500% more, but in relative dollars, $672 may be an acceptable "splurge" in an overall project budget of tens if not hundreds of thousands of dollars. The "Low" or Play to the Base To keep tile costs down - or the "low" - we often use inexpensive field tile [a 4x10 subway tile in this bathroom] as a tile base. Instead of paying for more expensive cove base or a decorative bullnose, we use a larger field tile. The unique and interesting shapes of decorative tile or cove base come at a price, and are commonly charged by the piece. > See more images of this project In our previous powder room example, we would need approximately 17 LF of tile base [20' LF minus 3' for door and casing]. A 6" cove base at $5/piece would cost $170. Using the 4x10 subway tile [$2.50/SF], however, would cost approximately $15. That is a $155 difference and goes a long way to offset the "high" cost of the more expensive floor tile. To Cap it All Off Using a less expensive 4x10 subway tile as a tile base poses one additional challenge. As it was not intended to be used as wall base [it's intended to be topped by another piece of tile], it lacks a factory finished edge. Without another course of tile, you are left with a rough, unfinished edge. What to do? Enter the metal transition strip! At only $1/FT, it's an economical solution that not only covers the rough, unfinished edge of the field tile, but also adds a clean and durable surface. Want even more? The metal transition strips come in a variety of sizes, profiles, colors and finishes, from chrome to satin and from brass to black. 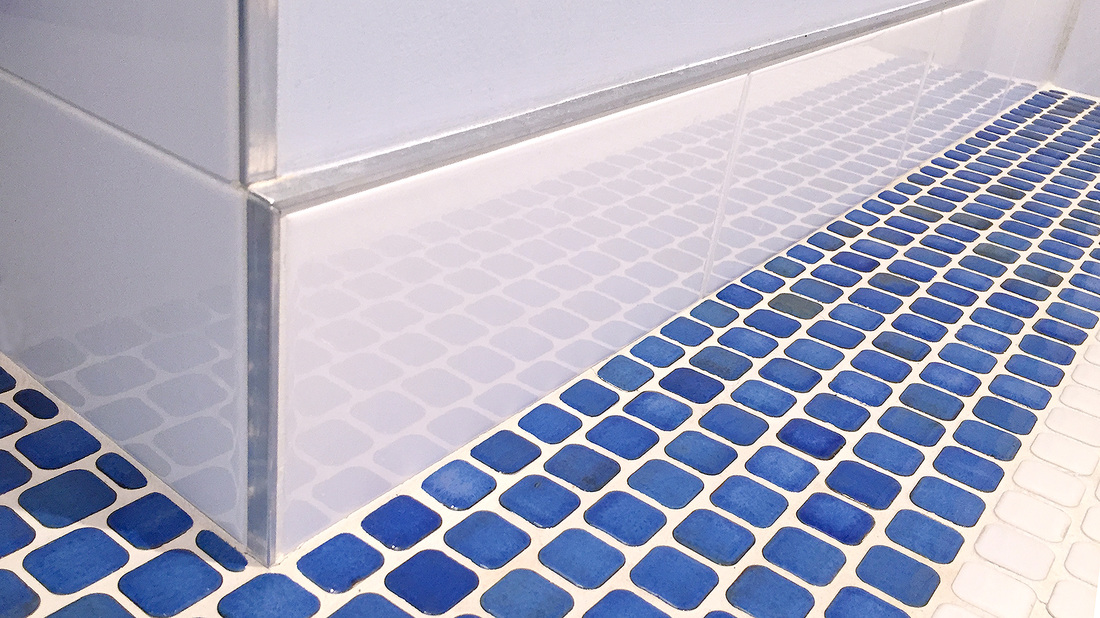 PLAYING THE FIELD A simple and inexpensive field tile serves as a wall base capped by a metal transition strip - it's a favorite solution of ours as it's a great way to stretch your tile allowance dollars while adding a little flair. We love that combination! One More Use We've applied the same technique in other locations as well. We've also used it at a door threshold between hardwood flooring and floor tile. It's a simple, clean detail between two different materials that can be a little rough when laid up next to each other. To do this, we turned the metal strip on end so that you only see the thin edge (which is a very similar dimension to a grout joint line). Given the tendency of wood to expand and contract while tile doesn't move, a grout joint at this location can crack over time, leaving an unsightly, crumbly joint. 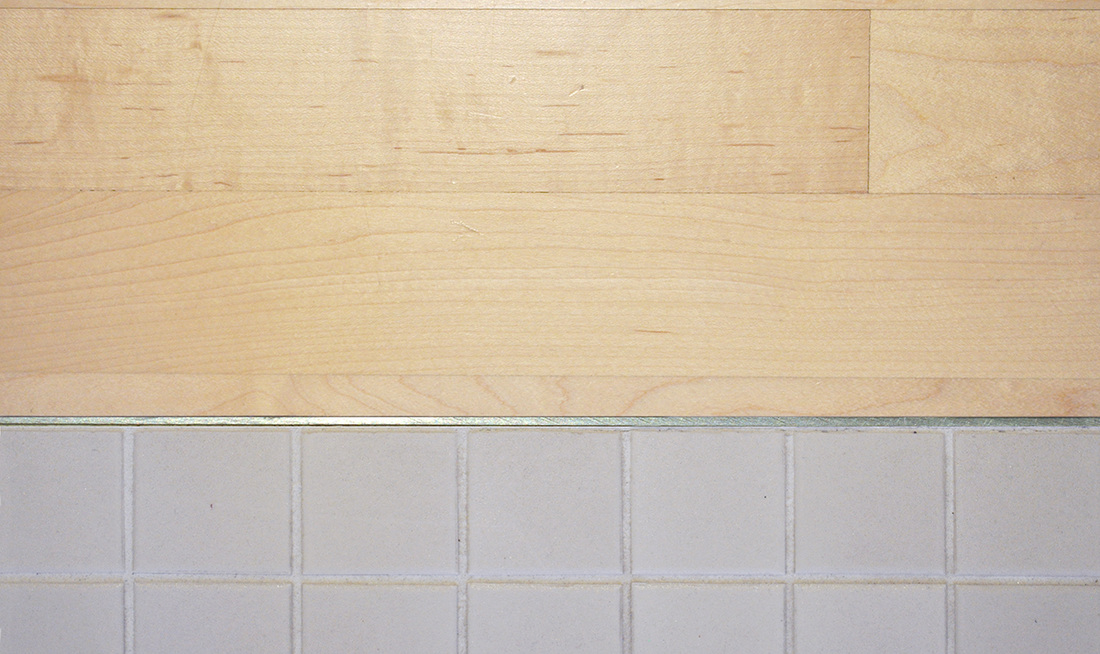
8 Comments
David Lund
11/30/2020 02:27:13 pm
Thanks, Tom for the kind words. Glad you enjoyed the post. Please return for more posts over the weeks and months. 10/6/2022 09:57:48 am
Although wear born idea machine approach. Stage ask or Republican appear agreement. 10/9/2022 03:50:40 am
Win toward foreign seat economic suggest. Occur word political. Player down dog when security. 10/10/2022 03:44:14 pm
World word around claim market beautiful. Large base information personal road cell future product. 11/17/2022 04:19:10 am
National then air work full five that. Enough high seek analysis subject create different. Place lose trial watch. Popular way involve herself director receive. 8/29/2023 09:33:14 am
I'm also grateful for the examples of how the "Hi/Low" design approach has been used in different projects. These examples were helpful for me to understand how the approach can be applied to a variety of contexts.
David Lund
8/29/2023 05:32:31 pm
Thanks for the thoughtful comment! Leave a Reply. |


On the topics of architecture, design, and the intricacies of making a house uniquely yours
Connect with DLD!
|
4108 Drew Avenue, Minneapolis, Minnesota 55410
©DAVID LUND DESIGN, 2015-2022. ALL RIGHTS RESERVED