
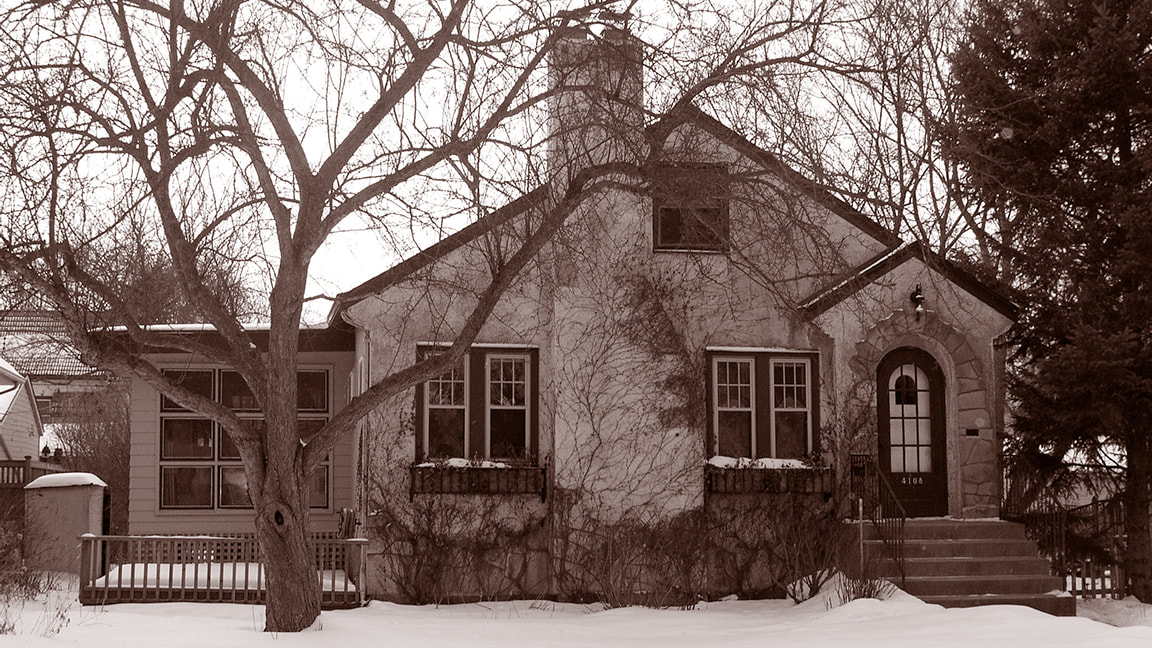
The StoryThe landscaping was so overgrown in the backyard you couldn't walk around the house.
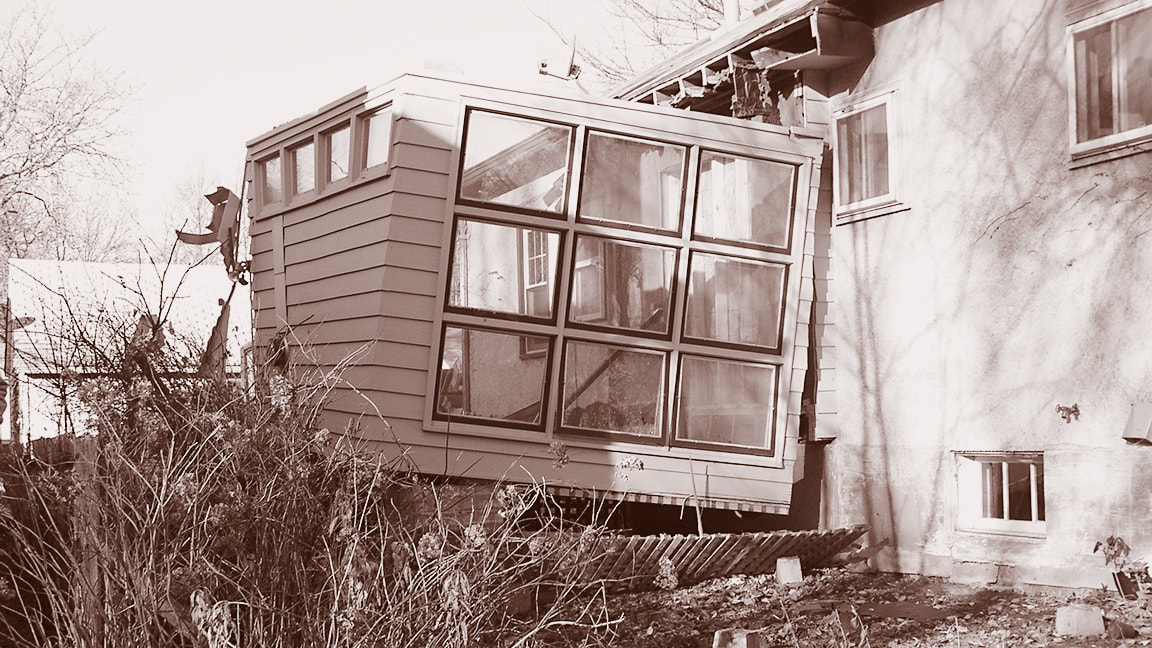
The main level layout was choppy, outdated, and inefficient. The 60’s-era sunroom was pulling away from the house and several rooms had up four layers of wallpaper - on the ceiling! DREARY The existing house in 2008, just prior to project start
The previous homeowners had lived in the property for nearly 65 years, the last ten of which the 90-year old owner lived alone. Over the last 35 years, little had been done to maintain the house, let alone improve it.
The maintenance needs of this house and the scope of this project was about as much as could be done, shy of tearing it down. Every Project, A Story As every project has a family, so too does every project have a story. This one, however, was hard to top. In January 2008, at the depths of the Great Recession, while carrying two mortgages, the father was laid off from his job. By March of 2008, they moved in to their "new" house and found themselves in a fixer-upper, with two young kids (with a third on the way), no job, no project financing, and consequently no viable project. 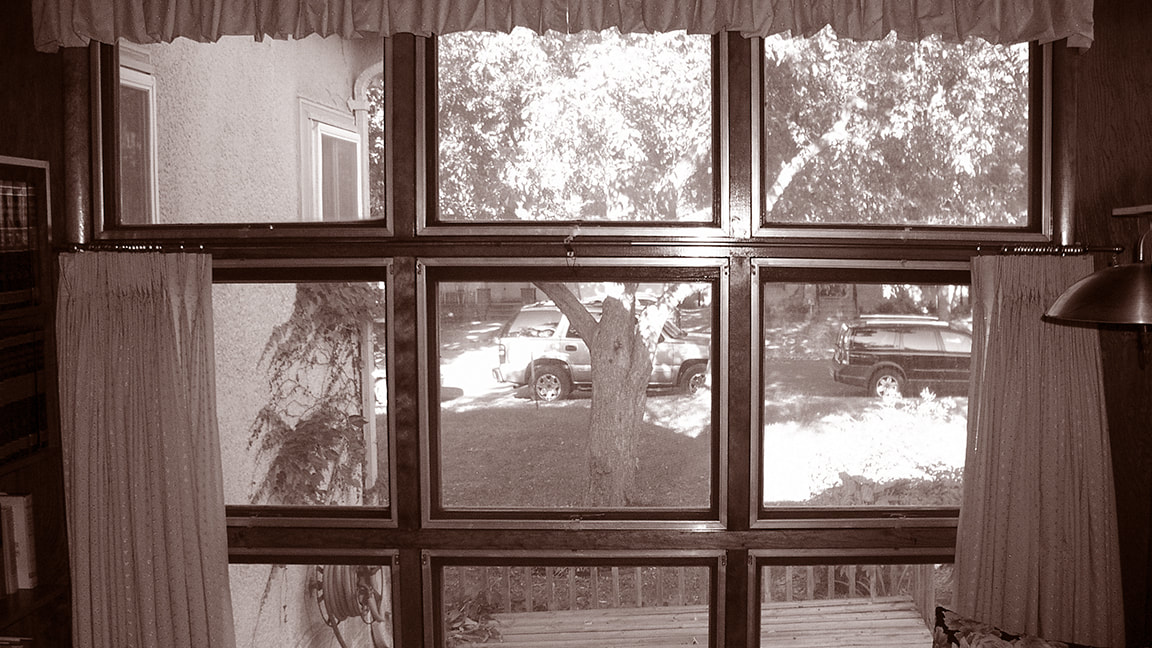
Inside the existing sunporch that was leaking and pulling away from the house.
Oh, and one more thing.
Over the last six months, in preparation for the project, they had spent nights and weekends demolishing the kitchen, basement and upper level, leaving many of the rooms raw and unusable. So as the moving trucks unloaded their items in the spring, the five of them would have to share one bathroom and two bedrooms on the main level - without a working kitchen. Not exactly the smoothest start to a remodeling project. |
2015 BLEND & ecoBLEND Awards
The BLEND & ecoBLEND Awards were established to encourage and reward builders, architects, and homeowners to blend newly remodeled or constructed homes and businesses into the fabric of Minneapolis neighborhoods.
DLD is honored to be twice awarded for this project.
DLD is honored to be twice awarded for this project.
The Project
DESCRIPTION Upper level addition and main level remodel
Back, then Forward
An upper level addition is as much about demolition as it is about construction.
At first, it can feel as if your project is going backward, not forward. Such was the case with this project as the demolition process occupied the first several weeks of the project and had as much of an impact on the final result as the new construction.
But here's the payoff.
Nothing leverages a home's existing features more than an upper level addition. It not only allows for the greatest amount of finished square feet to be created (and consequently value) with the least amount of construction dollars, but your house doubles in size without having to excavate and add new footings and foundation.
We call this high visual yield!
That said, it's not a project for the faint of heart.
Raw Material
Despite the neglected nature of the home, a substantial portion of the original house was retained to reduce construction costs and to maintain as much of the property's value as possible. One of the most expensive elements in a major addition is building a new foundation.
Excavation, footings, foundation walls, waterproofing, insulation, backfill, rough grading - all of these steps add up to tens of thousands of dollars just to get back to grade before any new finished sq. ft. are added.
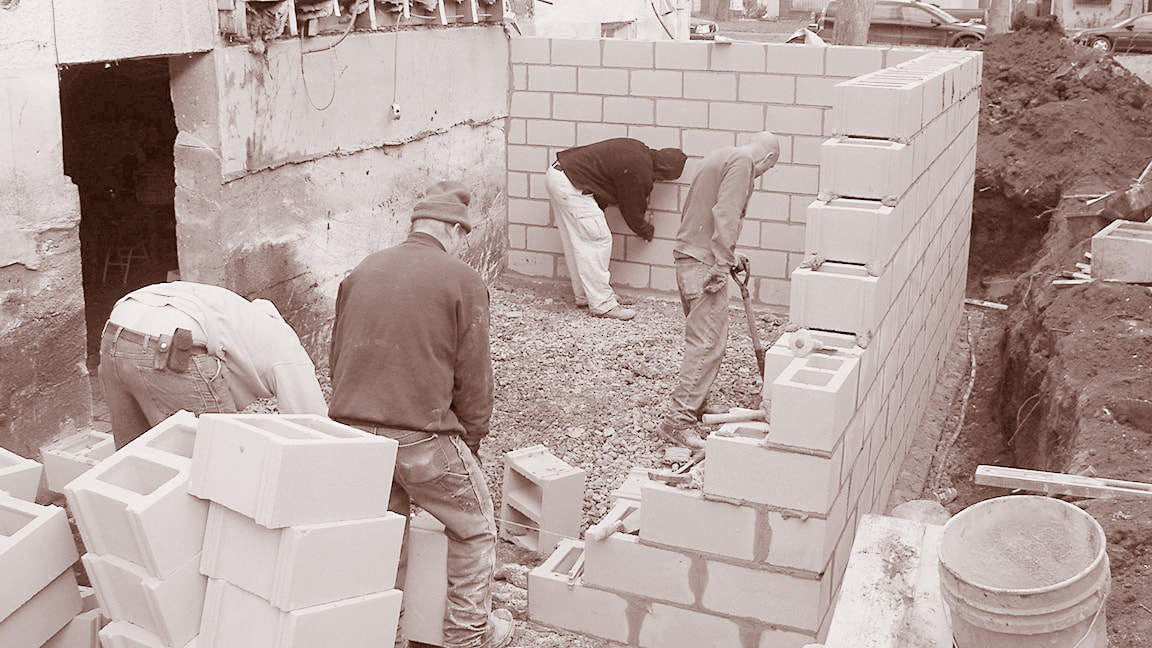
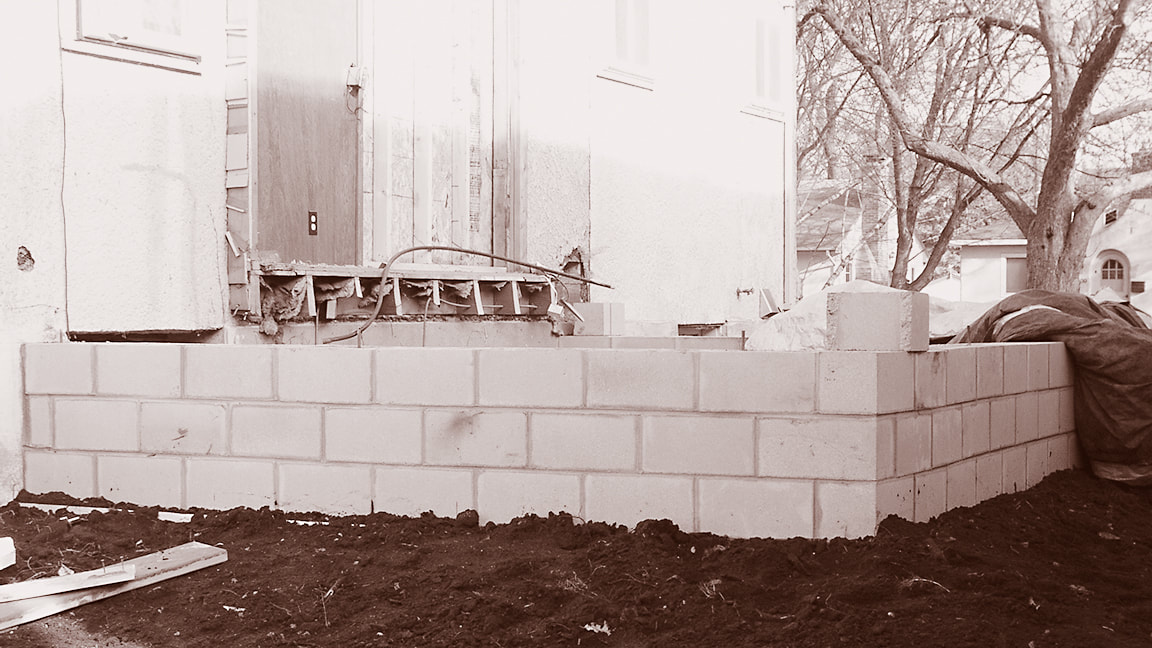
DIGGING IN The construction of new foundation is an intense and expensive proposition. Add additional foundation only if necessary to make the floor plan work.
For a project like this, re-using the existing foundation system, if it works for the new layout and is in sound structural condition is a great way to stretch your construction budget.
> For a deeper dive into this project and the family, see Raze the Roof
Keeping some of the existing house intact had another benefit.. Maintaining at least 60% of the original house keeps a whole-house remodel out of the city of Minneapolis's new construction catagory and the additional permitting and costs that come with that designation.
To comply with this target, remodeling work was carried out largely within the existing footprint..
Sunroom Sunset
The first thing to go was the dilapidated sunroom that was already pulling from the house.
In its place, new footings and foundation wall were built to support a two-story side yard addition, containing a main level family room and an upper level master bathroom.
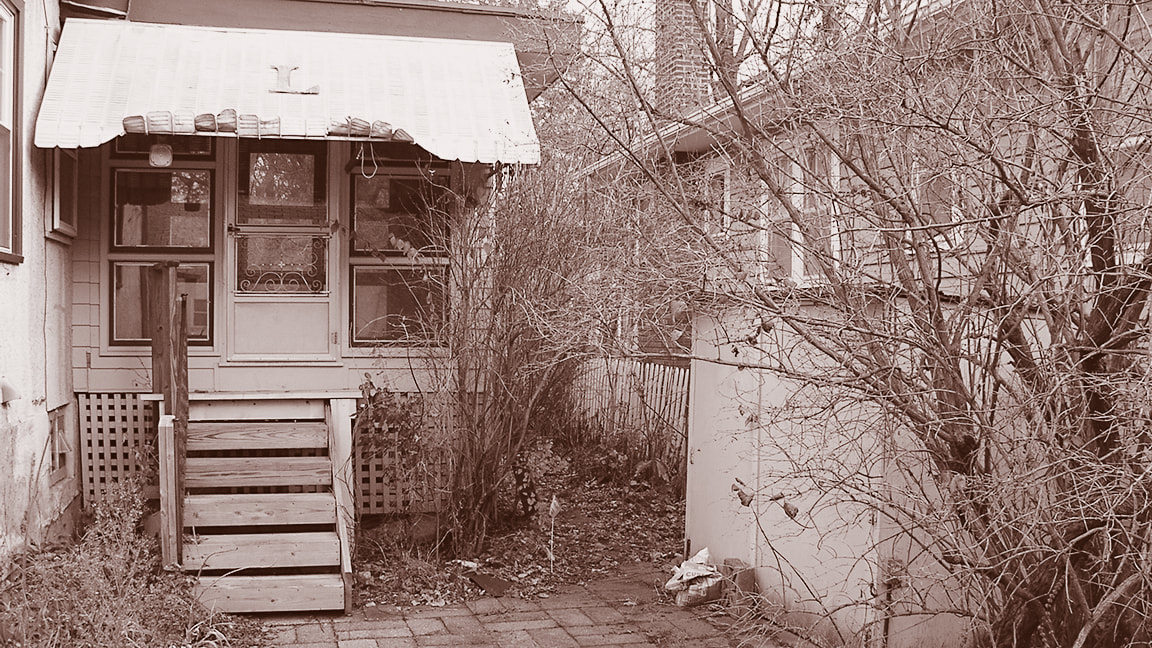
Original sunroom falling from the house
|
Sunroom on its way down!
|
Sunroom gone in 20 minutes!
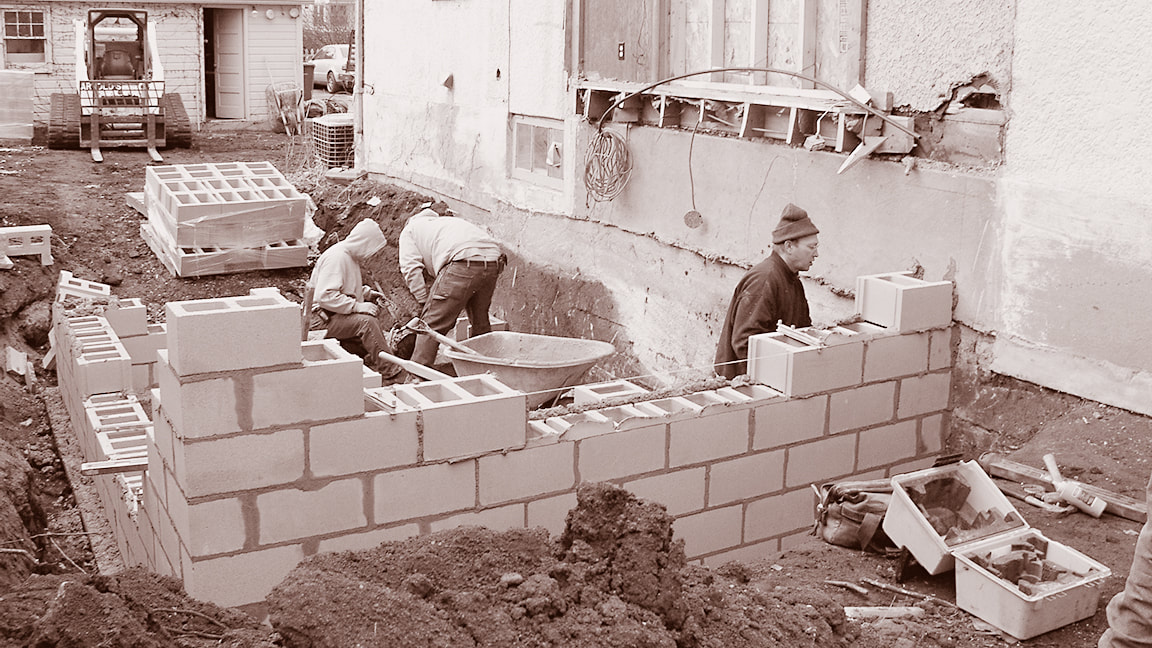
New foundation walls being laid up
|
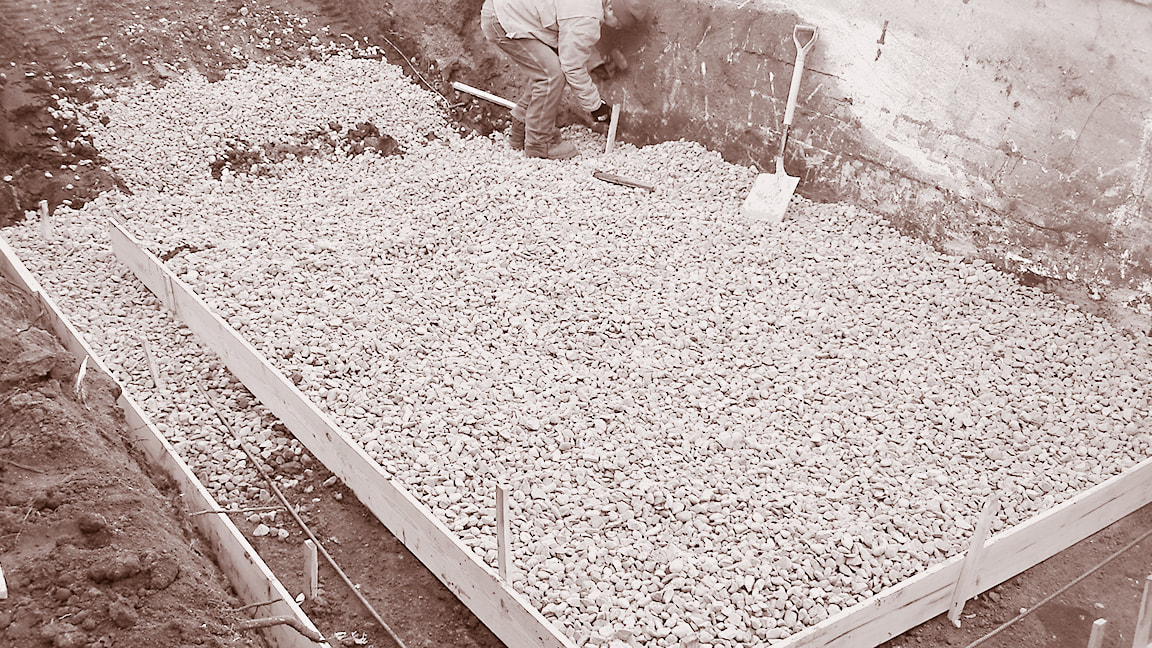
Gravel base below the concrete slab
All that work just to get back to grade!
|
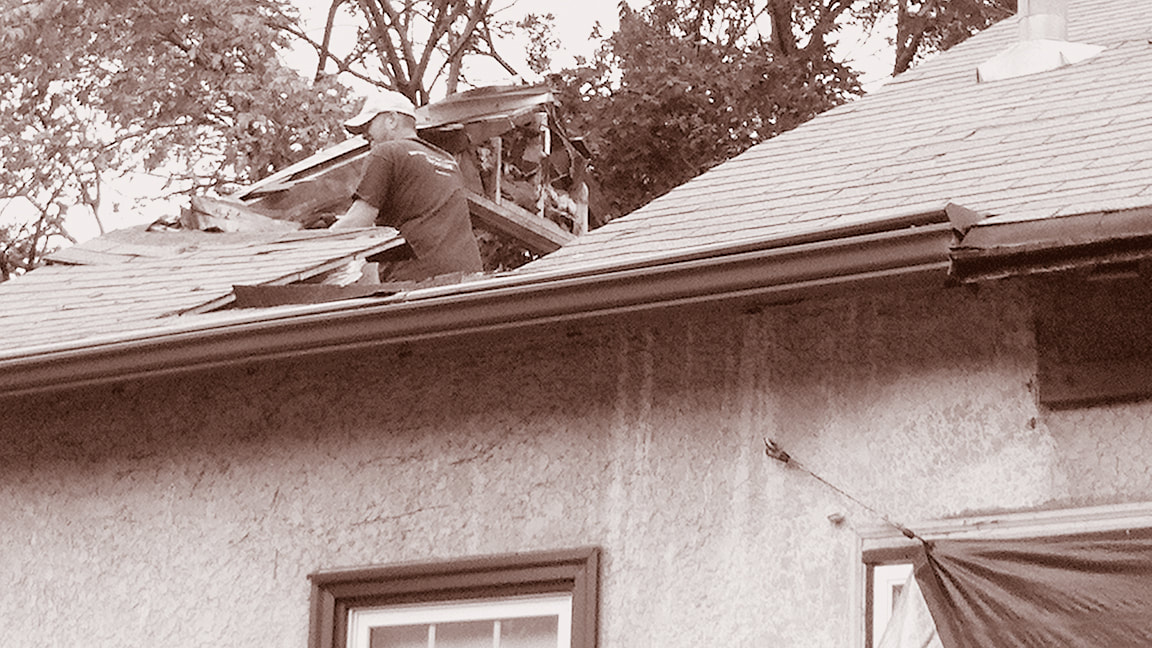
Raze The Roof
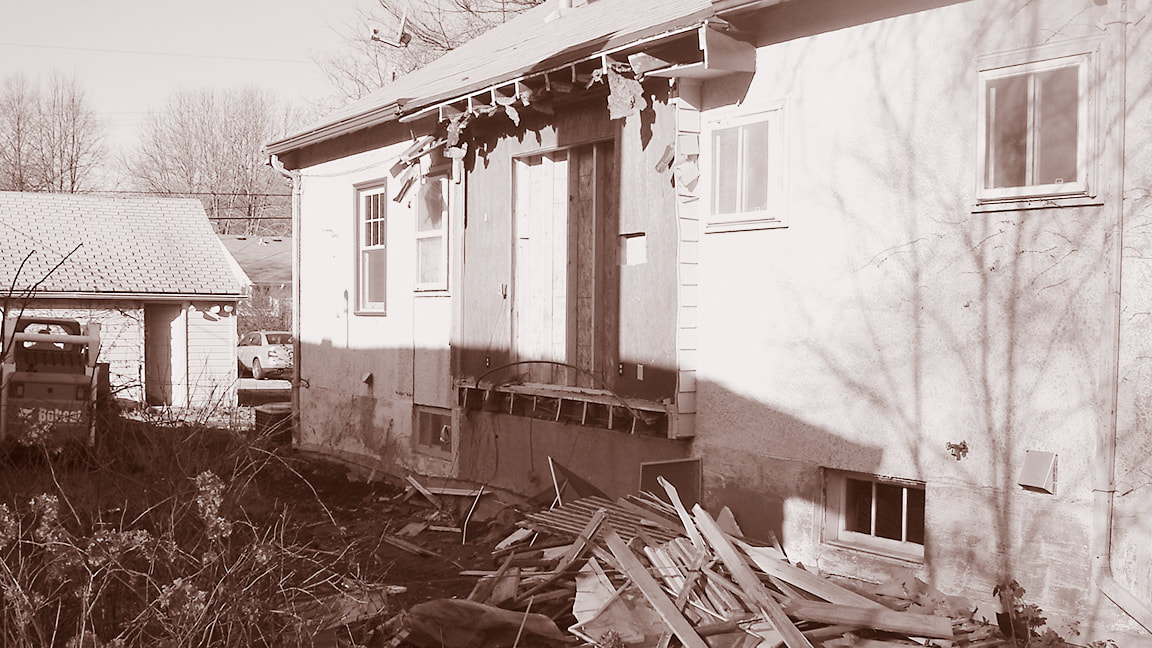
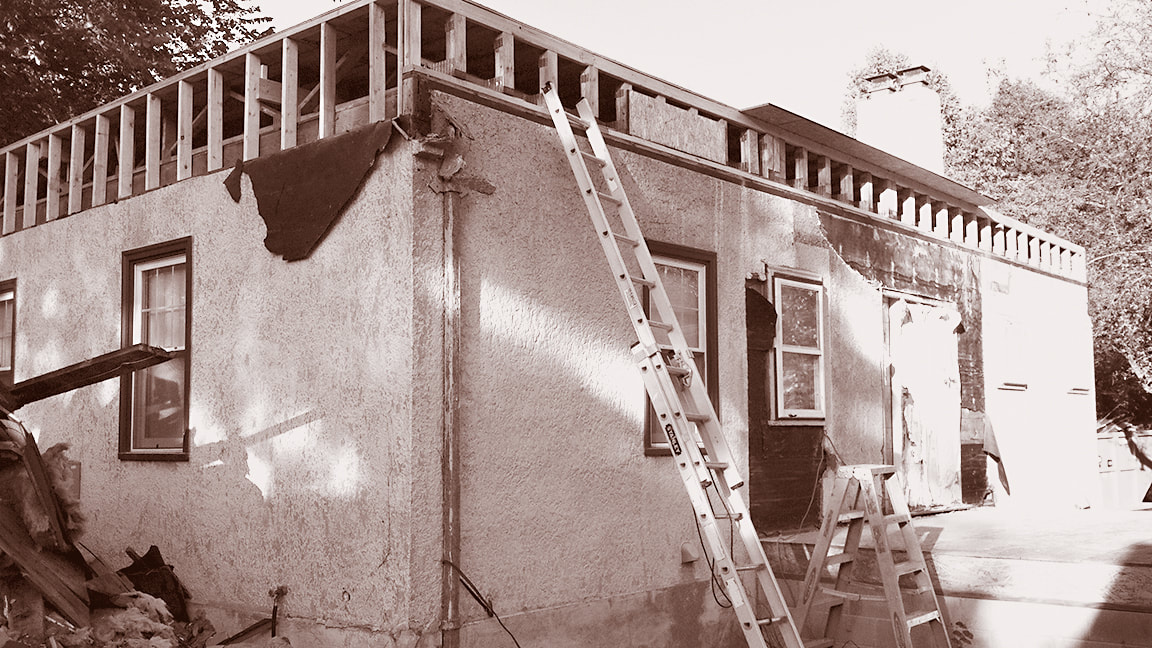
With the old sunroom out of the way, the next step was the removal of the existing roof and 1/2 story in preparation for the full-height new upper level addition.
> For a deeper dive into this project and the family, see Raze the Roof
Removing a roof seems like a big deal, and it is, but for a skilled demo crew it yields easily to sharp saw blades and beefy crowbars. Large sections are cut from the roof, lifted, and dumped to the ground. Piece by piece the roof recedes making for a fascinating display of strategic artistry and brute force.
The first roof sections come off quickly...
|

...and unexpected new views are created
|
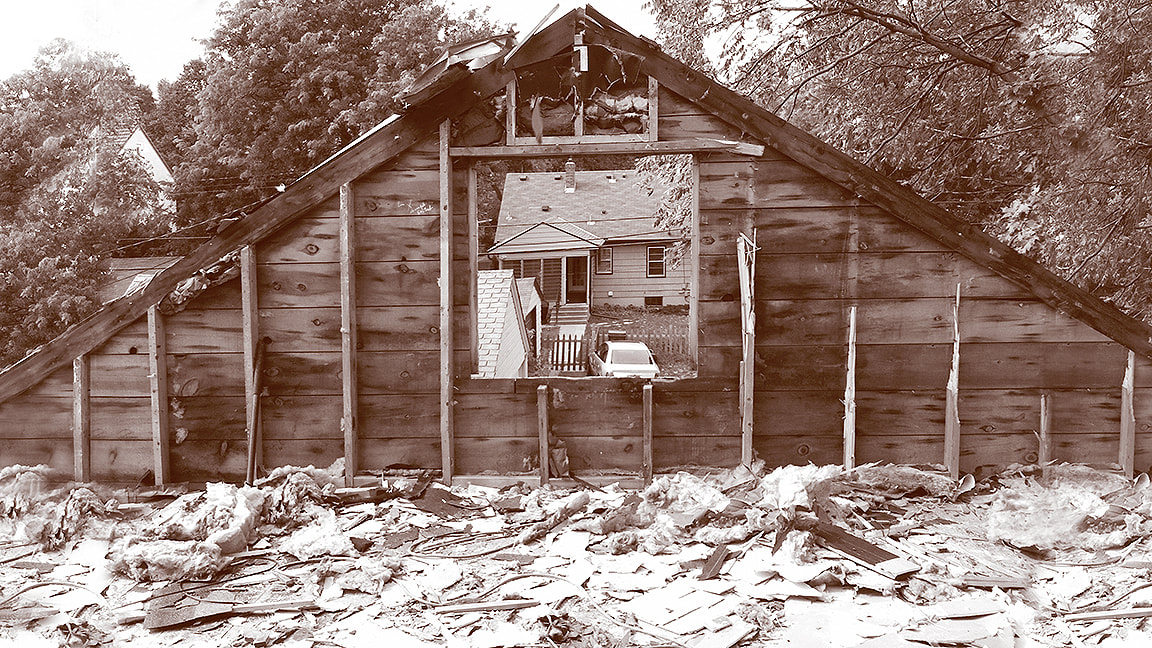
Within hours, the roof was off, and doors, windows, and walls were gone
Timing Is Everything
As stated, once underway demolition moves quickly. In fact, sometimes too quickly.
A dumpster was scheduled to arrive on Monday AM, ready for the first day of demolition. It did not arrive until Tuesday afternoon. It was never quite clear as to the cause of the delay, but the result of the missed delivery window was obvious.
By the time the dumpster arrived, the entire upper level was off and in a pile in the backyard. Missing the demolition start date by two days may not seem like a major mistake until you realize that the entire pile of construction debris had to be carried from the backyard by hand, piece by piece, to the now waiting (and empty) dumpster on the street.
Two weeks of back-breaking labor, countless slivers, cuts, and punctures made it very clear that before any demolition occurs an empty dumpster must be ready and waiting.
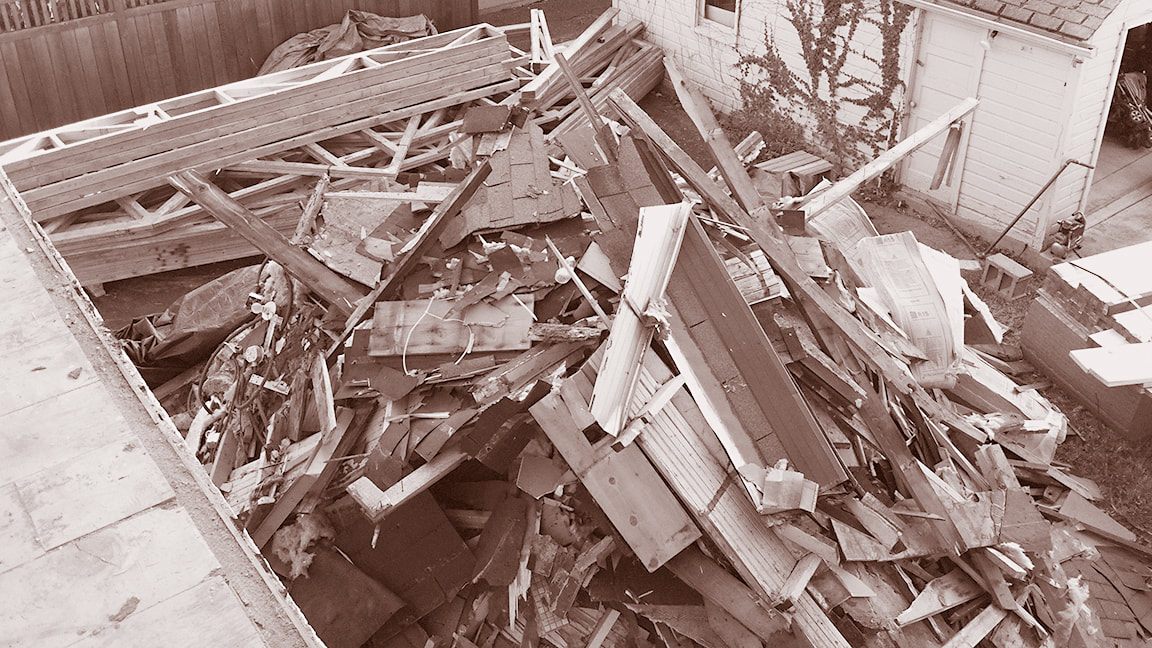
PILING ON An entire upper level ended up in the backyard in a matter of two days. Impressive speed matched only by the epic struggle required to carry the debris piece by piece to the dumpster in the street.
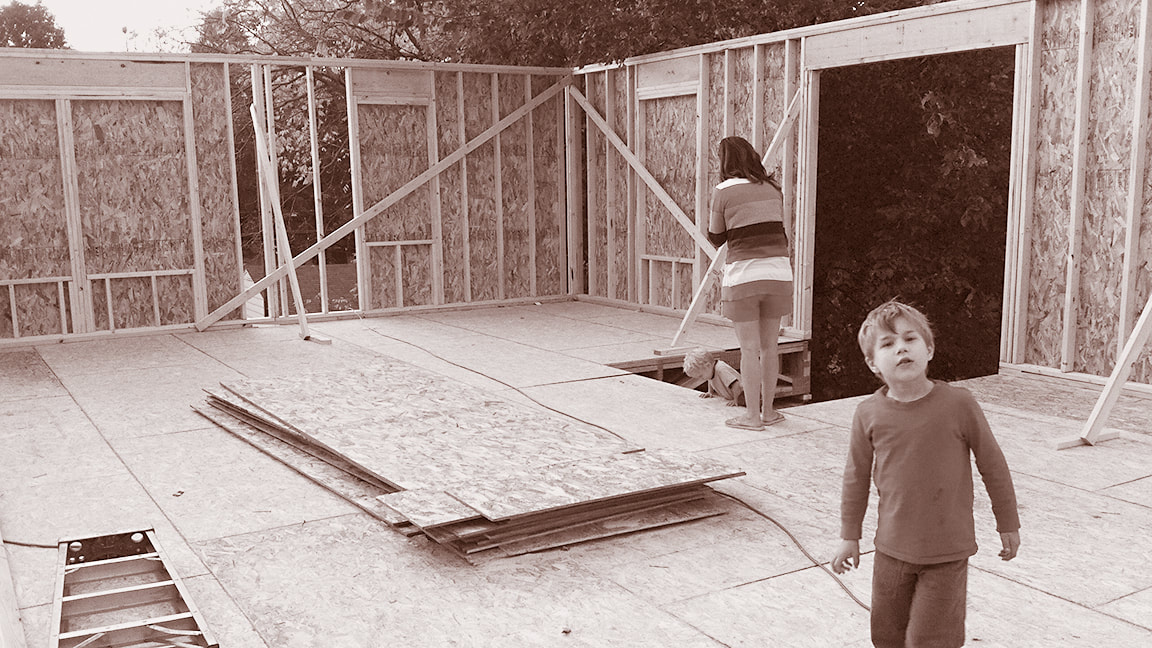
A New Upper Level, Or A Tabula Rasa
An upper level addition has the additional benefit of removing many unexpected and expensive surprises, as the entire upper level is now essentially new construction. There are no existing conditions to navigate, no surprises to discover, only a level and infinitely flexible plinth upon which to build.
An upper level addition has the additional benefit of removing many unexpected and expensive surprises, as the entire upper level is now essentially new construction. There are no existing conditions to navigate, no surprises to discover, only a level and infinitely flexible plinth upon which to build.
|

|
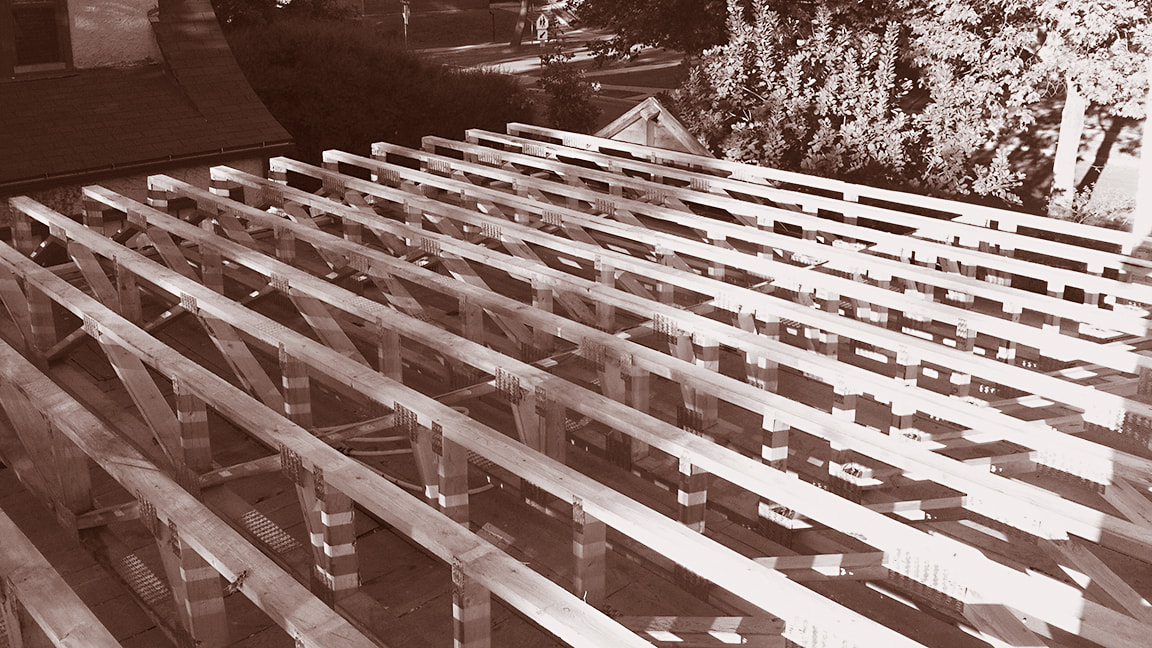
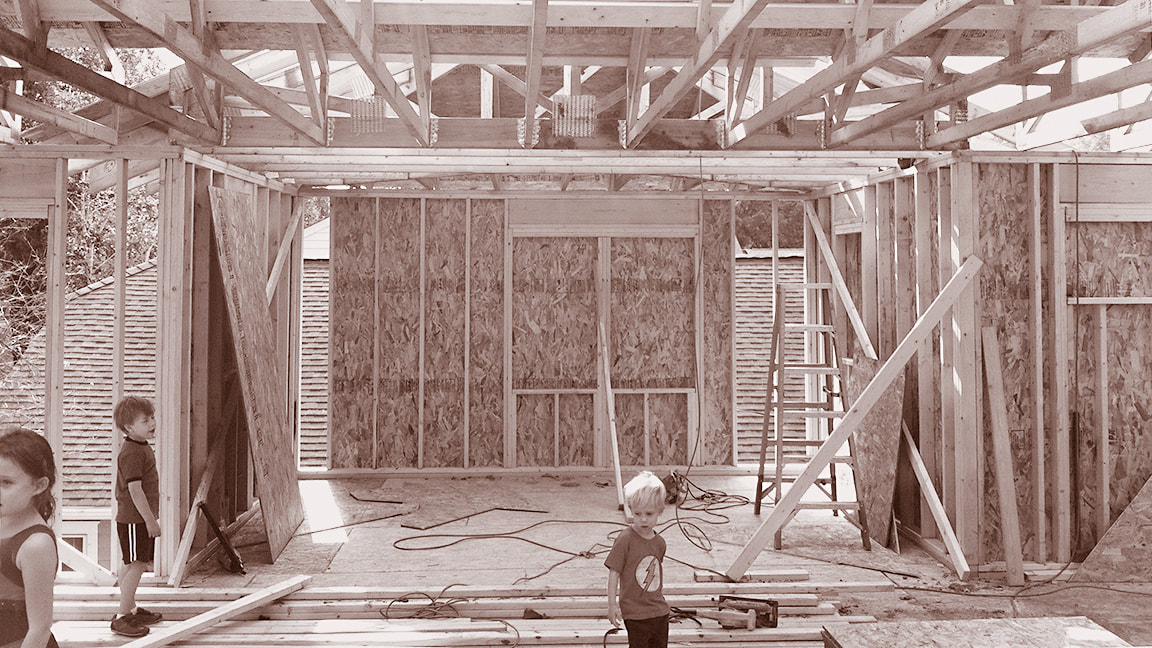
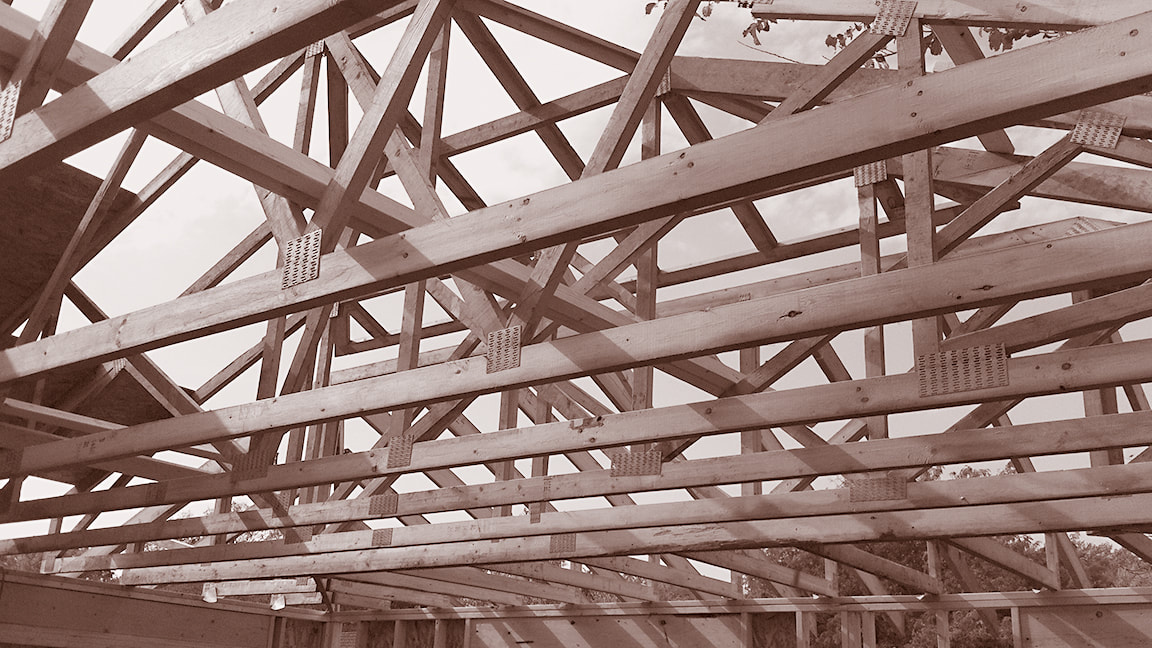
WALL TO WALL One of the best moments of an upper level addition (for construction nerds, anyway) is when the floor trusses are installed. Bearing only on the exterior walls, they span the width of the house and add no additional loads to the main level ceiling or interior partitions isolating them from the stress and weight of the new upper level.
Once the clear-span floor trusses and subfloor were installed, there was a blank slate upon which to work. Since all loads were being carried by the exterior walls, the interior partitions could be laid out and configured as desired, without having to align load bearing walls or bathrooms with those below.
The added benefit of new floor trusses, is that all new mechanical systems - pipes, vents, drains, wires, and duct work - can be run within the depth of the new floor system. Whole-house A/C, for example, was easily introduced by simply cutting openings into the main level ceilings and "dropping" new supplies into the main level.
At nearly 1,200 SF, the upper level was easily configured to accommodate four new bedrooms and two new bathrooms. There was even a little space left over for a storage/laundry room.
ALL ABOARD! The builder commented that you could park a bus on the upper level. We never tried.
A new floor truss system provides unlimited layout flexibility
|
And a stable platform upon which to build
|
To Top It Off
One of the potential draw backs of a new floor truss system is the additional height they add to the house, up to two additional feet.
To offset this fact, a low-pitched, hipped roof form was chosen to reduce overall building height and to keep the house in scale with the neighboring homes. From the street, the roof nearly disappears.
|
|
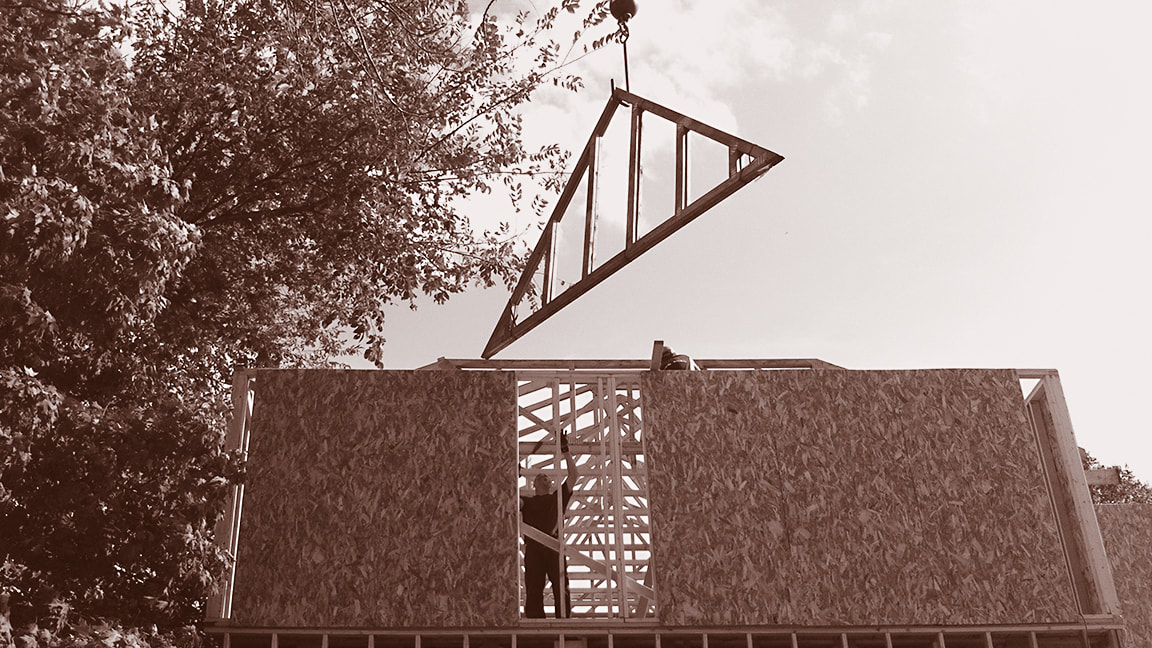
ALL ABOARD! One of the many challenges of building at this scale on a city lot is the lack of space for construction equipment. Given the tight side yards and tight alley roof trusses could not be dropped on site, they had to be craned off the delivery truck and set in place. Made for a speedy installation and a substantial dent to the wallet.
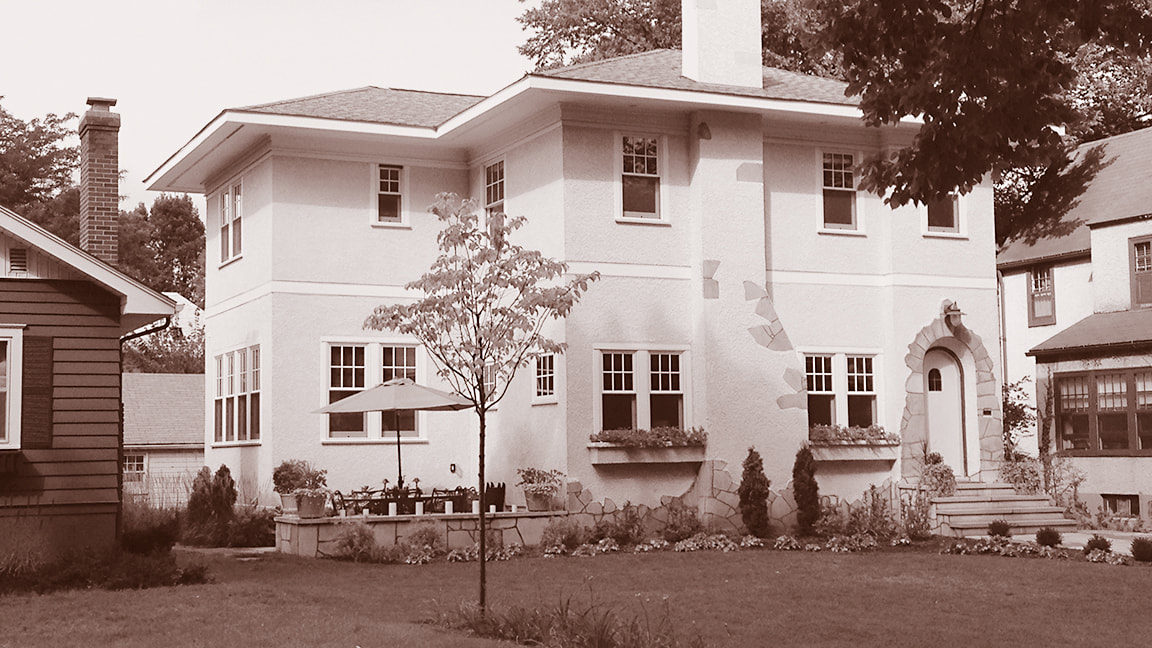
Photo Finish
The goal was for the finished project to look as if it had always been a 2-story house - a natural, stately home that at first glance shown no sign of alteration.
No small task.
Helping to achieve this goal is a new stucco finish.
Stucco is a great (although more expensive) way to tie in the new upper level addition with the existing main level. The finished house now has a single, unified finish that creates a seamless (and timeless) appearance that looks as if the house was always this way and sets it up for the next 100 years.
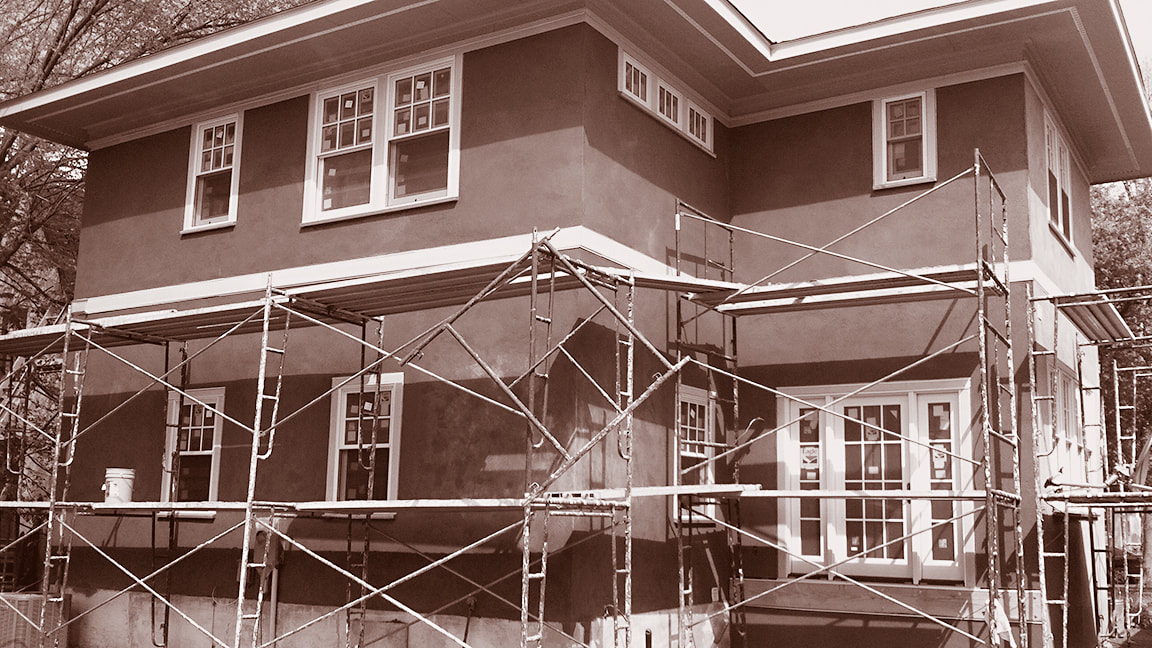
The stucco scratch, or "brown" coat
|
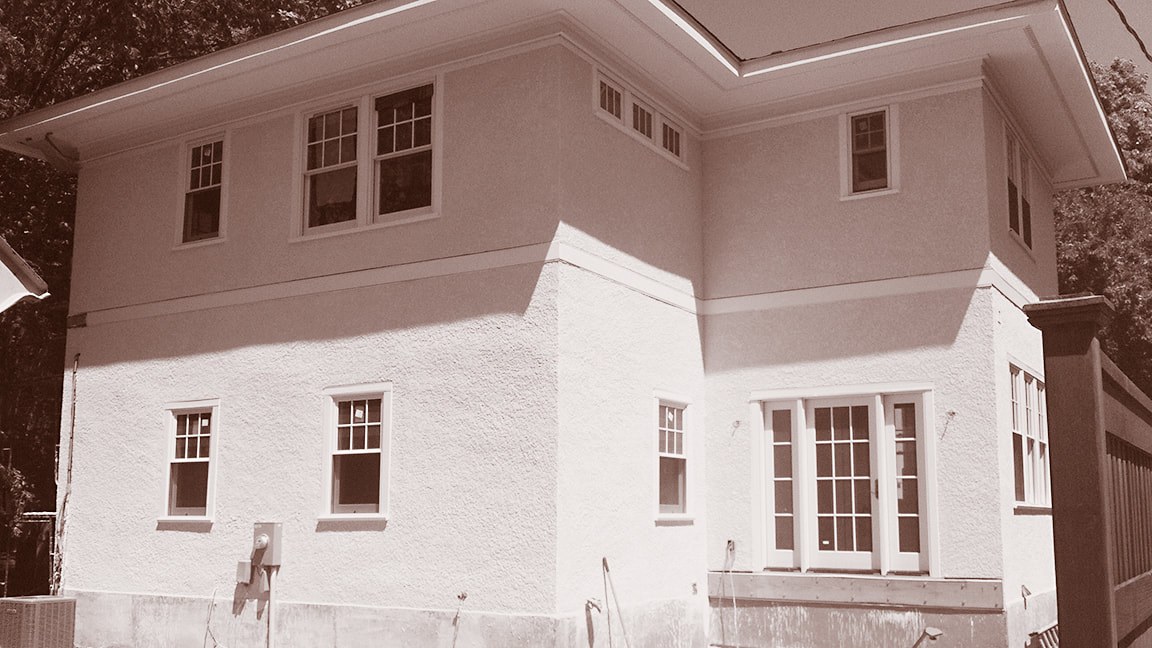
The stucco finish coat
|
In the end, this project is essentially a new home with period details that fits the character of the neighborhood, has ample storage, generous-sized bedrooms, updated bathrooms, a modern kitchen, and new mechanical systems.
What a beautiful mix.
What a beautiful mix.
In the end a "new" construction with deep ties to its original history.